SHIFTING ROOTS

home, garden, food, and prairie lifestyle

  • About
    • Contact
    • Work With Me
    • Features
    • Privacy Policy
  • Blog
  • Gardening
    • How to Start a Garden: Especially if you’re in Zone 3 or Zone 2
    • Seed Starting
    • Vegetable Gardening
    • Perennials
    • Cut Flowers
    • Small Space Gardening
  • Recipes
    • Canning
    • Preserving
    • Prairie Fruits Cookbook
    • The Best Pumpkin Recipes
    • How to Make a Tempting Christmas Cookie Tray (Plus Recipes!)
  • Popular Posts
  • E-Books
    • Pretty & Practical Garden Planner
    • Cut Flowers Made Simple
    • Constant Colour Perennial Garden
    • Small Garden, Big Harvest
    • Growing Roots Online Gardening Course
    • Frost Proof Flower Garden
    • Bouquets Made Beautiful
    • Savvy Seed Saving Annual Cut flowers
    • Prairie Fruits Cookbook
    • Online Gardening Consultations
  • Seasons
    • Christmas

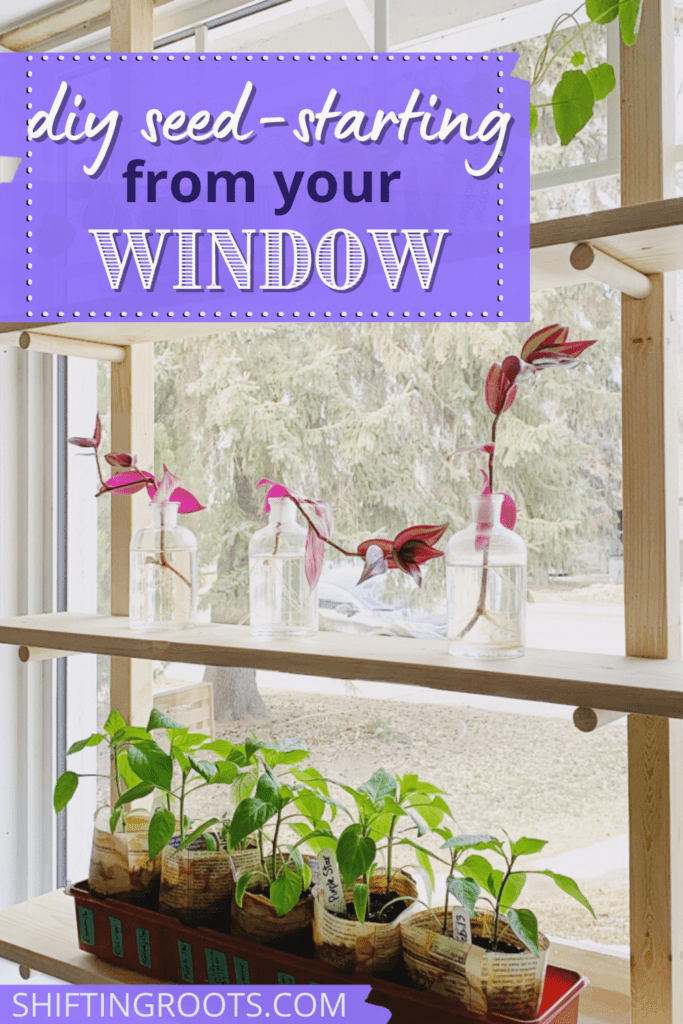
DIY Seed Starting from Your Window

January 14, 2020

Pin495
Share9
Tweet
504 Shares

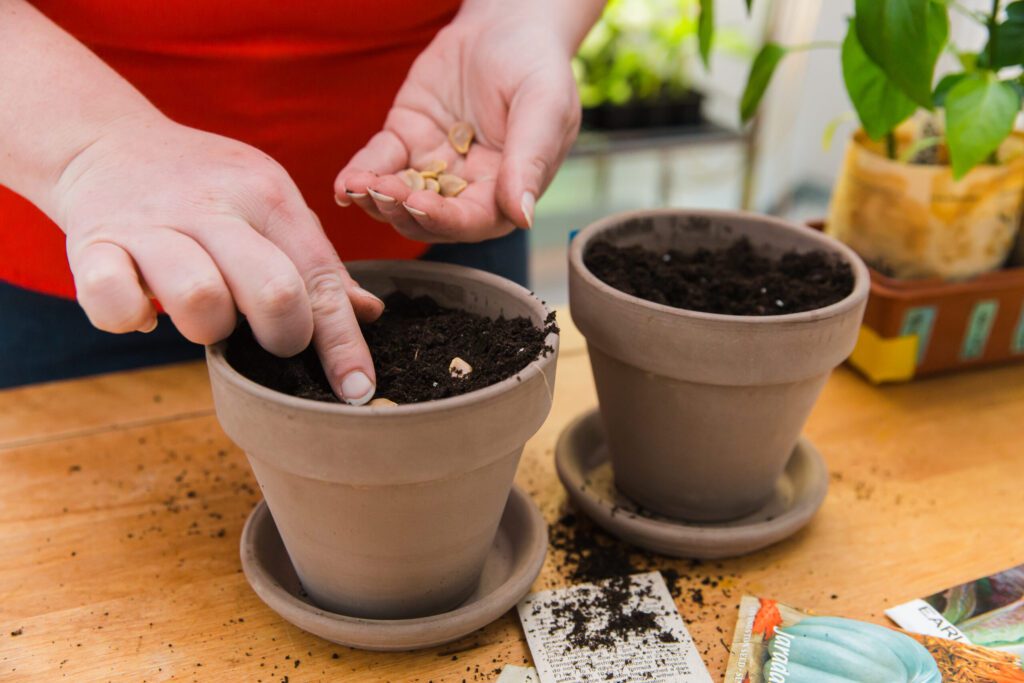
When I was a little girl my Grandmother started marigolds every winter in a little modified milk garden planter with her seeds from last year’s crop.  I loved those marigolds in her brick planters and still think of her every time I see a marigold.

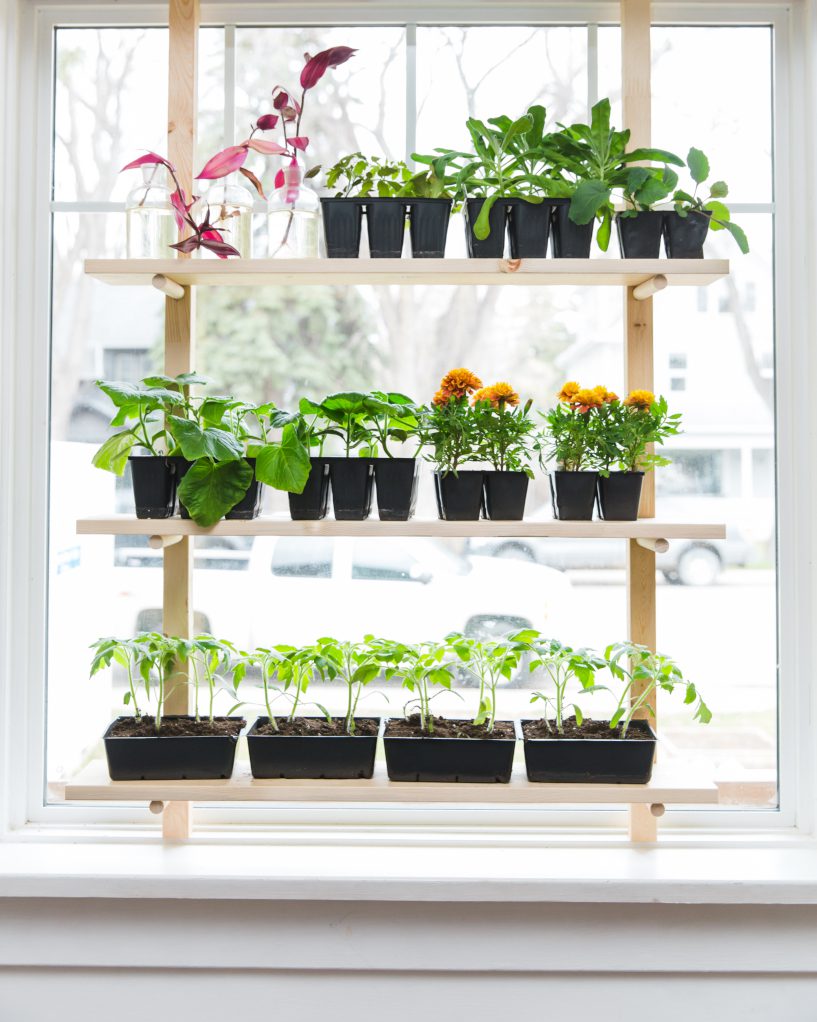
You really don’t need a grow light or other expensive equipment to start seeds. Seed starting from your window is relatively easy, but there are some limitations.
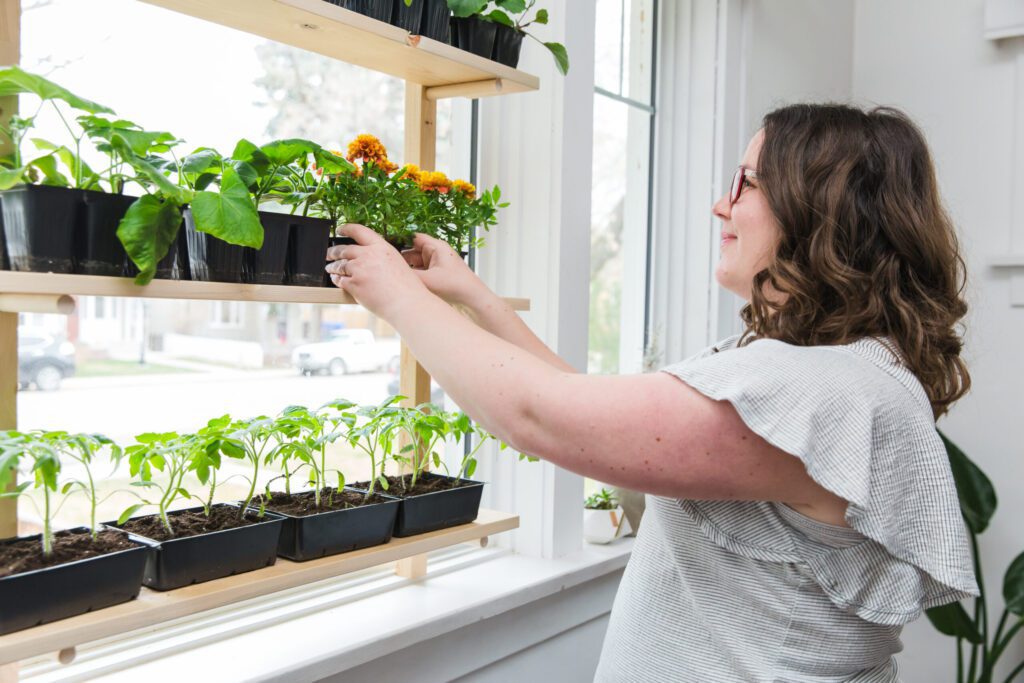
South Facing Windows Are Best

First of all, you must have a South-facing window. East-facing ones can work too, but they must be larger and it also helps if the wall colour of the room is white or light.  

If you try to start seeds from other directions, they will get too stretched out or “leggy.”  Even better–a south facing corner window.  In our last home we had one (two?) that faced south and east.  You’ll also have to turn your plants everyday so they don’t lean too much in one direction.
Related: 20+ Seed Companies and Nurseries to order your seeds from

Don’t Start Too Early

I live in Saskatoon, Saskatchewan on the Canadian Prairies. There simply isn’t enough daylight to sustain my seedlings until mid-February at the very earliest.

Wherever you live, don’t start your seeds until the Persephone days are over–the days generally between November and January when there is less than 10 hours of sunlight a day. The easiest way to figure out when your Persephone days end is to go to the the weather app on your phone and calculate how many hours there are from sunrise to sunset. When it reaches 10 hours of daylight, you’re good to plant!

Keep Your House Warm

Second, you must keep your house warm. This is not the time to be stingy with the thermostat!!  Many seeds require a temperature of around 21 degrees celsius to germinate.  (That’s why you’ll see lots of ads for seed mat warmers in gardening magazines.)

Maximize your window’s growing space by making this DIY seed starting shelf.

You’re not the Greenhouse. . . yet.

Finally, don’t expect your seedlings to be just like the ones at the greenhouse.  The gardeners at your local green house are using grow lights, fertilizing, and watering correctly.  That doesn’t mean you can’t succeed, just manage your expectations.

Organize Your Seeds by Week Needed to Seed Start

To start, read the directions on the seed packet to see when you can start those seedlings.  Plants like artichokes, peppers, brussel sprouts and flowers can be started as early as February.  Tomatoes will need to be started late March or early April.

Plan the Perfect Garden

Get your free Garden Planner and worksheets and start creating the garden of your dreams.

Success! Now check your email to confirm your subscription.

There was an error submitting your subscription. Please try again.

We won't send you spam. Unsubscribe at any time. Powered by ConvertKit

Plants in our area typically go out on the May long weekend (around May 21st) as that is when the last frost has often past.  To figure out when to start your seeds, count the weeks backwards from that date.  The Old Farmer’s Almanac has a handy tool to find your average frost dates, as well as your hardiness zone.

Resist the temptation to start your seeds even earlier than recommended. It seems like such a good idea in February, but is a bad one in May when your seedlings have outgrown their containers and they’re difficult to harden off because they’re too big.

A south facing window, seeds, dirt, and a few common household items are all you need to start vegetables in your home!Click To Tweet

Then each week when it’s time to start a new batch of seeds, you won’t have to go searching for the right seeds, or worse yet, miss seed starting something altogether.

The Best Seed Starting Containers

Over the years, I’ve tried a lot of different containers to start my seeds. I’ve used egg cartons, reused the plastic containers seedlings come in from the store, jiffy pods, random found objects like plastic yogurt containers, milk jugs, and clear plastic bakery containers, and made my own biodegradable newsprint containers.

Each type of container has its pros and cons.

Egg Cartons

Egg cartons are super cute and Pinterest-worthy, but they’re actually my least favourite method to seed start. (If you’ve come here from a pin with pictures of me starting seeds in egg cartons–I’m sorry!!)

They are not ideal to start seeds that require 6-8 weeks indoors.  You’ll have to transplant your starters to larger containers as the roots become too long and start to grow into the egg carton itself.  Only start vegetables that require 2-3 weeks indoors.
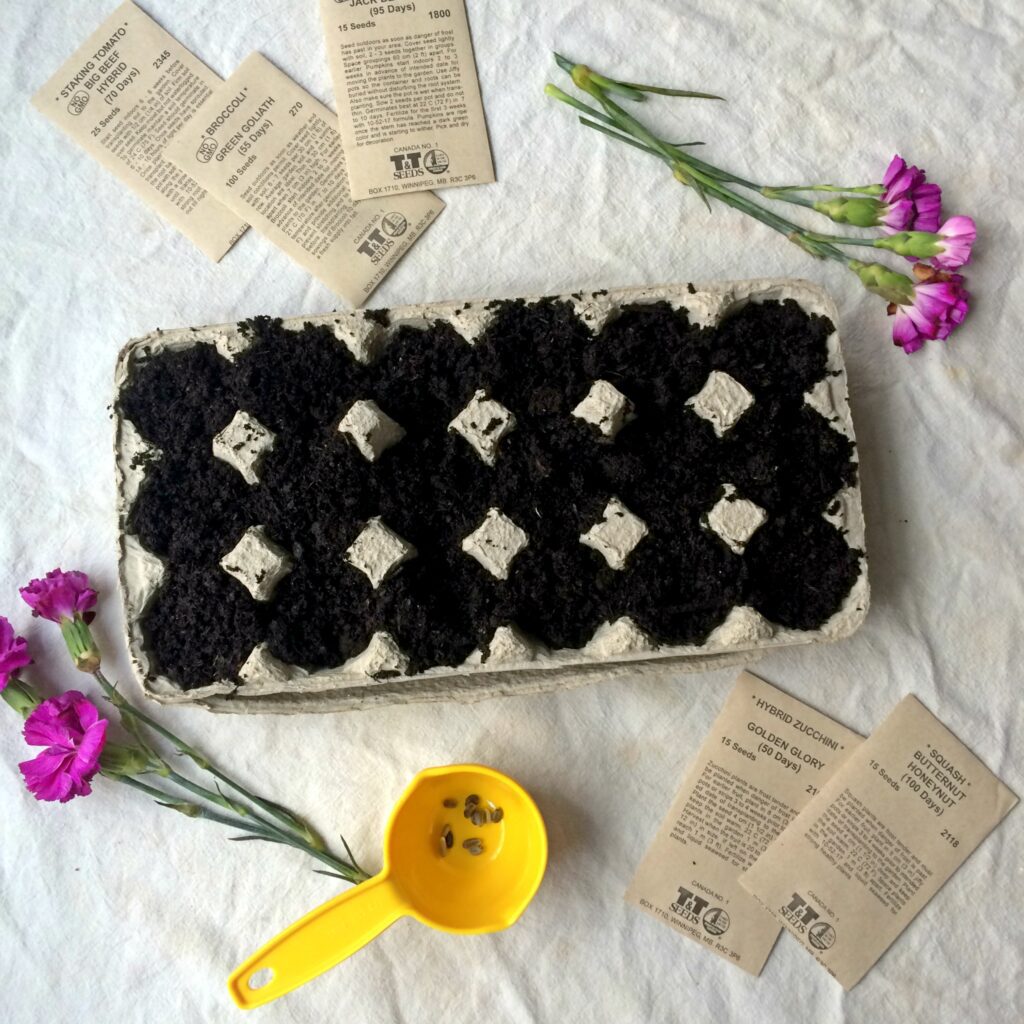
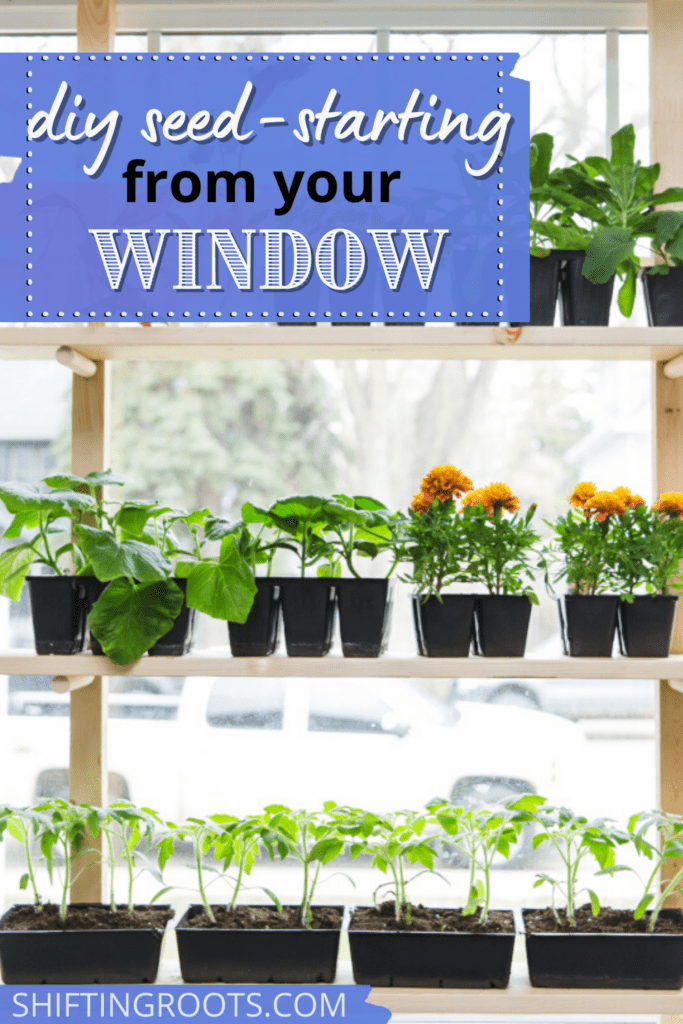
Learn how to start vegetable and flower seeds right from your window! I've compiled some easy seed starting tips for the beginner gardener to have you growing plants in your home using DIY containers. No need for fancy equipment! #gardening #seedstarting #seeds #vegetable #flower #fromyourwindow #diy #beginnergardener #easy

Jiffy Pods

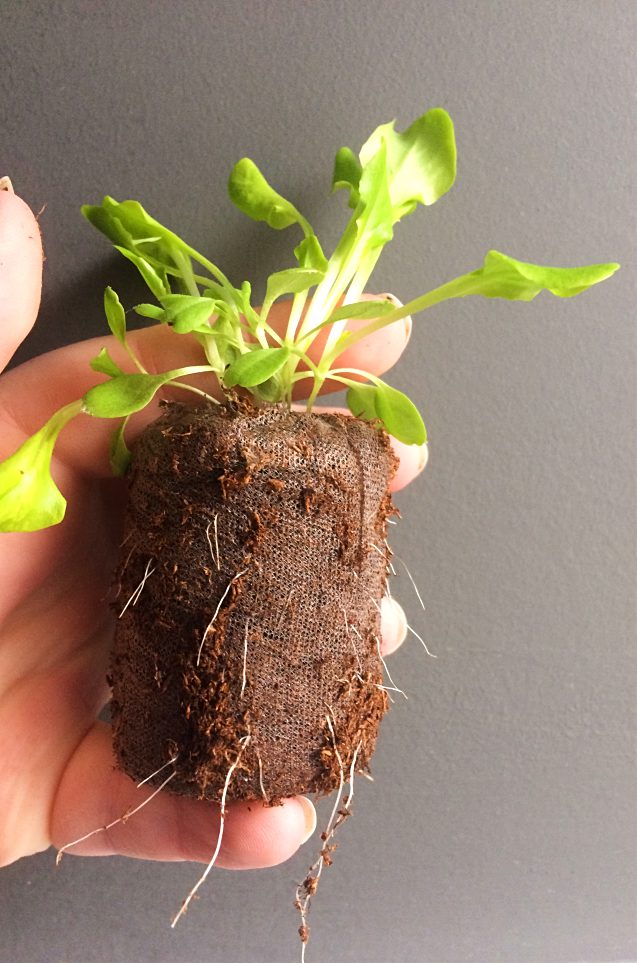
Jiffy pods are so easy and fun to use–I love them! I also love that you can buy kits that are specifically made for windowsills. Save the plastic parts for reuse, and fill them with new Jiffy Pods each season.

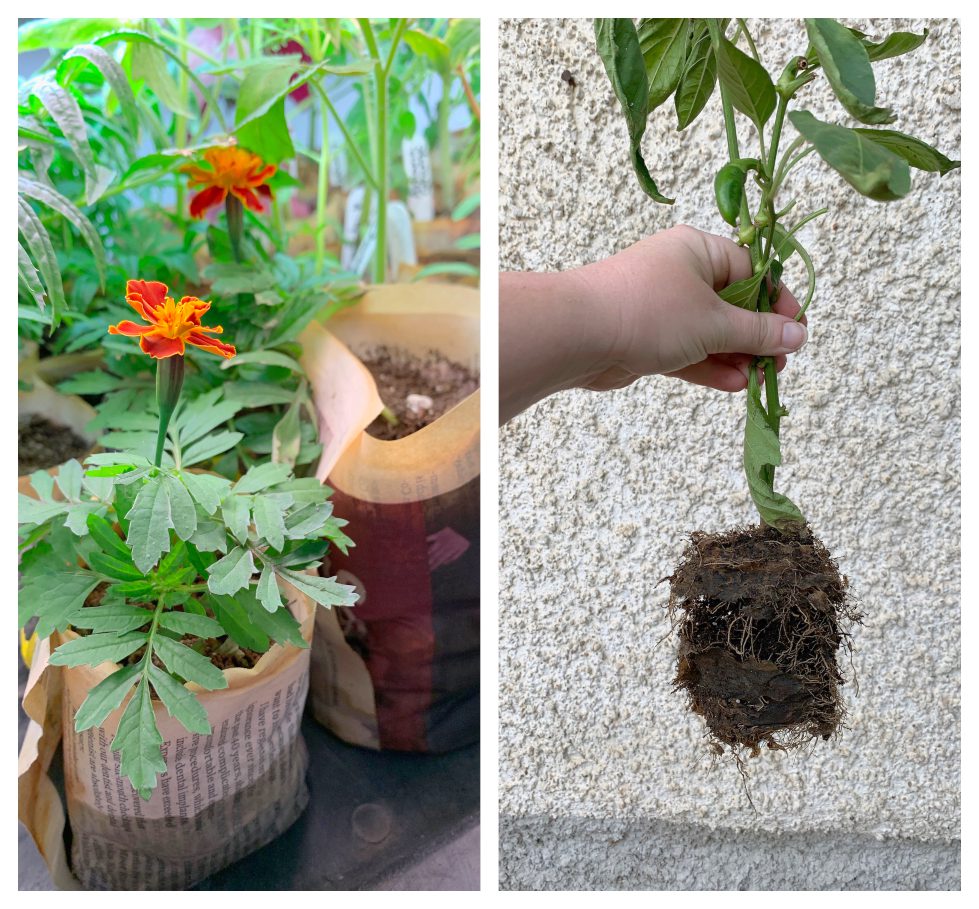
Once the roots grow through the Jiffy pod (as pictured below), transfer to a larger container with more soil.
Repurposed Objects

You do not have to buy special flats to start your seeds!  Use milk cartons and jugs or deeper plastic lids and plant away. You will either need to add drainage holes, or be careful not to overwater your seedlings. I’ve made a list of 10 common household objects you can start saving in January and February so you’ll have lots of containers in March and April.

I also save the black plastic containers my annual flowers come in, so I can start my own annual flowers year after year in those same containers.

Check out this video for more details on how to use common household items:

Biodegradable Newspaper Containers

This is my new favourite way to seed start. Follow this guide on how to make the containers, and start your seeds. If you need to move your seedlings, make sure that the containers have dried out–otherwise they will fall apart if you try to move them when wet.

The question I get asked most often about these containers is–do they really biodegrade? I’ll let this picture speak for itself. . .

Fun fact: apparently artichokes should be started 10-12 weeks before you intend to put them out in the garden.  It’s a good thing I ordered my seeds so early.  (New gardeners: most seeds require you to start them 8 weeks at the earliest, and more commonly 3-6 weeks.)

Plan the Perfect Garden

Get your free Garden Planner and worksheets and start creating the garden of your dreams.

Success! Now check your email to confirm your subscription.

There was an error submitting your subscription. Please try again.

We won't send you spam. Unsubscribe at any time. Powered by ConvertKit

Related: 6 Truths New Gardeners Should Know

Hints for Beginner Vegetable and Flower Gardeners

If you’ve never started seeds before, here are a few things to remember:

  • Plants need time to germinate.  This means your seeds won’t sprout for at least a week, sometimes more.
  • Water when the soil feels dry to the touch.  If the ground is pulling away from the edges, you’ve waited too long.
    Watering from the bottom of the tray, not the top of the plant, is best. 
  • The ground won’t look wet at first, but it will once the water has a chance to soak up.
  • If you’re worried about overwatering or washing out your seeds, use a spray instead.
  • Do all the fertilizer directions on the seed packet sound confusing? Water with a fertilizer formulated for seed starting (it will be labeled as such) once every two weeks to give your plants an extra boost.  You can follow the exact fertilizer directions once you gain more confidence as a gardener.
  • Start with new seeds.  Some seeds can be viable for up to 10 years or more, but your germination rates decrease.  
  • Stick to seed starting two or three types of plants the first year.  It’s easy to get overwhelmed.
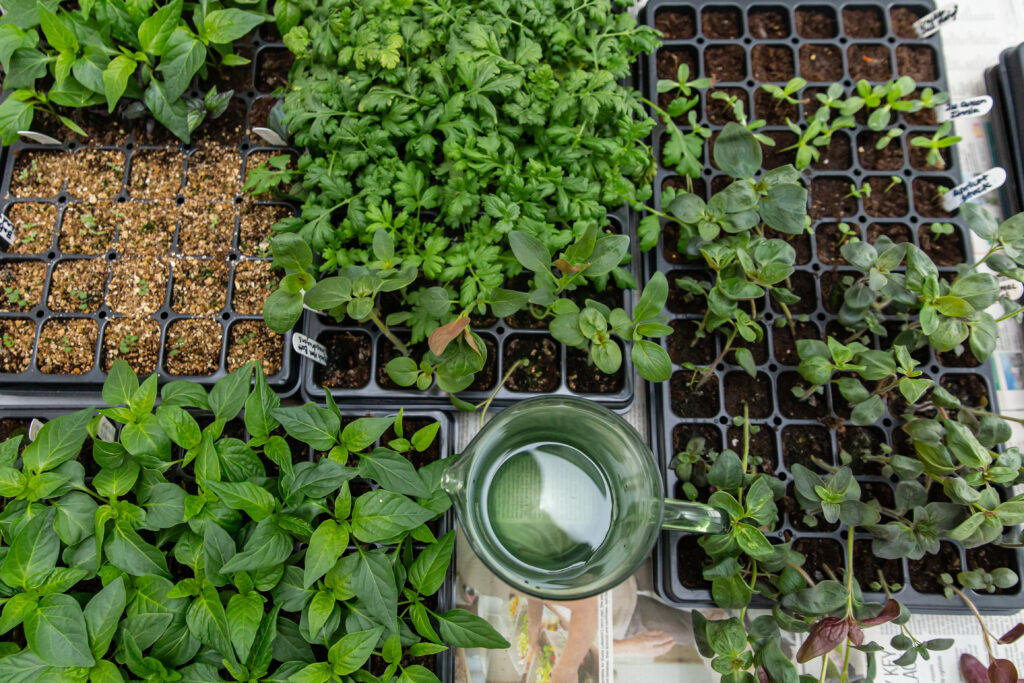
Want to learn more about seed starting without grow lights? Here’s everything you need to know all in one place!

Seed Starting Results

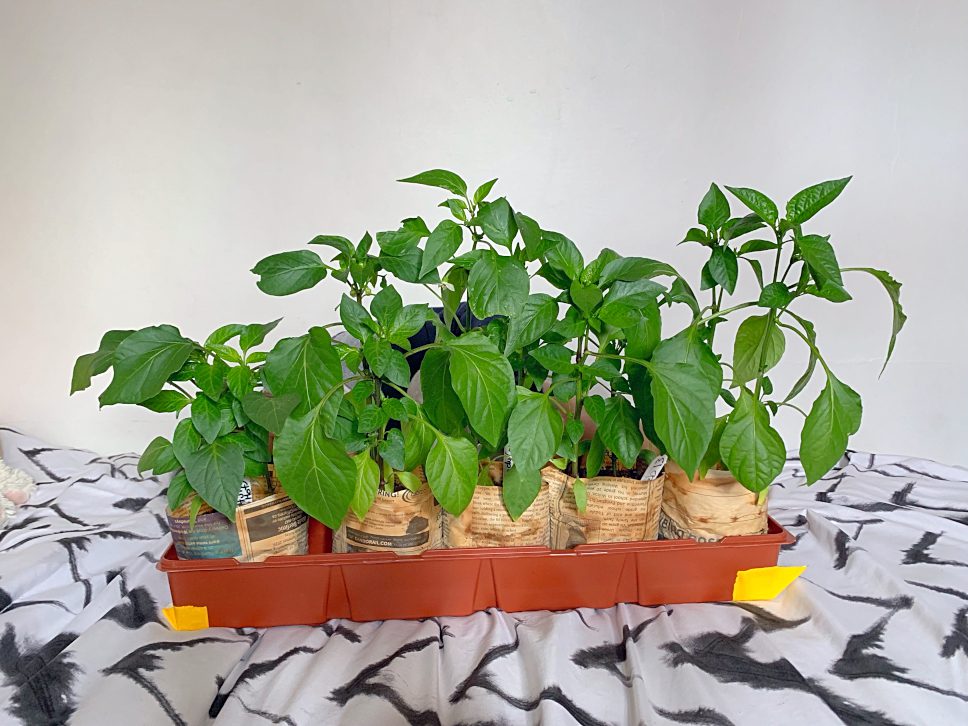
I think it’s important for you to see what kind of results you can get from seed starting for your window. Here are my peppers from spring 2019 which were started from seed in front of my south facing window. If you look closely, you can see that my seven-year-old son is crouched and hiding behind them–that’s how big they are!

I don’t know if you can notice, but these plants are so big that my 7 year old is curled up behind them, hiding.

It took me about 5 years to perfect my pepper growing process, but you can grab all my secrets here and get your peppers looking like this a lot faster.
So that’s all you need to know about seed starting from your window in a nutshell. If you have any questions about the process, I’d love to hear from you on Facebook or Instagram.

I love gardening stories!  Let me know what you’re planting this year or any tricks and tips you have about seed starting without spending a fortune.

Kristen Raney

Kristen is a former farm kid turned urban gardener who owns the popular gardening website, Shifting Roots.  She is obsessed with growing flowers and pushing the limits of what can be grown in her zone 3b garden.  She also loves to grow tomatoes, but oddly enough, dislikes eating them raw.

3 Comments
Filed Under: DIY, Gardening, Outdoor Life Tagged: Flowers, Gardening, germinate, plants, seed, seed starting, seeds, south window, Vegetables, window

About Kristen Raney

Kristen is a former farm kid turned urban gardener who owns the popular gardening website, Shifting Roots.  She is obsessed with growing flowers and pushing the limits of what can be grown in her zone 3b garden.  She also loves to grow tomatoes, but oddly enough, dislikes eating them raw.

Comments

  1. CdnErin says

    November 13, 2017 at 9:46 am

    I have a really difficult time throwing seeds away. I found a stash of seeds this past August in a toolbox in my unheated garage... the spinach & cauliflower & a packet of romaine had to be at least 18 years old, so I just dumped them in an empty raised bed so that I could recycle the paper packets... then the spinach sprouted! I was shocked. It grew quite well, too! I used to grow "off the rack" corn but it was always such a risk, because "Early Canada" is still a fairly long-season crop for the Edmonton, AB area. Then a few years ago I ordered a synergistic variety from Vesey's. They all sprouted & grew beautifully! But I had 140 leftover seeds... I've always been told that corn seed MUST be fresh or you're get terrible germination, but the following summer I was laid off so couldn't fit a seed order into my budget. SO I double-sowed the corn seeds to make up for the fact that they were over a year old. Yeah, every single one sprouted. Then the third year, I figured I might as well use the seeds up. My garden was too dry at first to do the soil amending, then it was too wet, so I sowed the (3-year-old) corn seeds in little peat pots w ith potting soil just to give them a bit of a head start, so I wouldn't be planting too late. Wouldn't you know every single one sprouted! That would NEVER have happened with off the rack seeds! I've tried starting tomatoes, peppers & basil in a south window, and they just gt leggy because the light, south or not, isn't strong enough for them. I use a proper grow light now, but I have also used just a plain old compact flourescent bulb stuck in my stove hood fan then the plants sit on my stove... I was amazed at how much better they did under that compared to the ones in the south window. I've tried starting seeds in egg cartons, but they always go moldy on me :( And I wasn't keeping them too wet or anything, just having the moist paper pulp was enough. I've often saved the lids from bakery cakes as my "tray" to hold pots, they work really well. Great blog, I'm going to go read some more of it!
    Reply
  2. Debbie Jespersen says

    September 12, 2019 at 12:49 pm

    I start my seeds in 4" pots instead of egg cartons, just because it saves me transplanting, and also I don't go overboard with the amount of south light I can provide. I used to transplant into pots and then didn't have enough good windows for the increased size of the containers. I have added a grow light above my plants, even though they are in a south bay window. My tomatoes especially like this. They don't stretch out as much. If tomato plants get leggy, just lay them in a "trench-shaped" hole, and gently bend up the top 3' inches to be above ground. The buried stem will root really well and give the plant the advantage of a strong nutrient delivery system.
    Reply
  3. Sarah says

    October 21, 2020 at 12:22 am

    Awesome
    Reply

Leave a Reply Cancel reply

Your email address will not be published. Required fields are marked *

This site uses Akismet to reduce spam. Learn how your comment data is processed.

Grow roots with us

  • Email
  • Facebook
  • Instagram
  • Pinterest
  • Twitter
  • YouTube

Welcome!

Hi, I'm Kristen and I help new gardeners learn to grow their own vegetables and beautify their yards. I also share recipes that use all that delicious garden produce. Grab a coffee (and your gardening gloves) and join me for gardening tips, simple recipes, and the occasional DIY, all from the lovely city of Saskatoon, Saskatchewan.

P.S. First time gardener? You'll want to download the quick start gardening guide below!

Recent Posts

  • How to Grow Eucalyptus for Cut Flowers (Even in a Short Growing Season!)
  • 26 Best Flowers to Grow for Dried Flower Arrangements
  • 17 Perennial Flowers That Love Shade
  • How to Design a Cut Flower Garden in Raised Beds
  • How to Start a Cut Flower Garden

Welcome!

Hi, I’m Kristen and I help new gardeners learn to grow their own vegetables and beautify their yards. I also share recipes that use all that delicious garden produce. Grab a coffee (and your gardening gloves) and join me for gardening tips, simple recipes, and the occasional DIY, all from the lovely city of Saskatoon, Saskatchewan.

Connect with Shifting Roots On. . .

  • Email
  • Facebook
  • Instagram
  • Pinterest
  • Twitter

Find What You’re Looking For. . .

Privacy Policy

Growing a luffa sponge was possibly the most chall Growing a luffa sponge was possibly the most challenging and finicky thing I've taken on so far as a gardener in zone 3.  And all I got to show for it was 3 baby loofah sponges, which are so precious to me that I can't bare to actually use them. (Kind of defeats the point, doesn't it?)⁠⠀
⁠⠀
I'll be starting mine soon, so I though I would share some of the improvements to the growing process from last year.⁠⠀
⁠⠀
1. Plant in larger containers!! I thought I used large enough ones, but I sorely underestimated how big these plants would get indoors.  Once of my readers suggested buckets, and I think this is an excellent idea.⁠⠀
⁠⠀
2. Plant only 1 plant per container.  I thought loofah's would be like a cucumber or pumpkin or other vining squash where you plant in a hill.  The containers with two plants in them did not do as well as the single seed containers.⁠⠀
⁠⠀
3. Have a string for the vine to climb.  Cutting the vine off of my window screen was not fun.⁠⠀
⁠⠀
Will you try luffas this year?⁠⠀
⁠⠀
#luffasponge #loofahsponge #luffachallenge2012 #seedstarting #wintergardening #indoorgardening⁠⠀
Got the seed starting itch? There's some things y Got the seed starting itch?  There's some things you can actually seed start now and you won't end up with crazy leggy seedlings and endless problems.  In fact, these plants require that you start now, and need to be started in zone 3 by the end of February at the absolute latest.⁠
⁠
I've already started some lisianthus and eucalyptus, and am waiting on my seed orders to start some more.⁠
⁠
If you're starting a luffa sponge, make sure you have some sort of eventual plan for the vine.  last year mine went over my fall windows before I was able to take them outdoors.⁠
⁠
P.S. I've actually never started onions from seed, so if anyone wants to chin in about their experience, feel free!
Growing eucalyptus for the first time this year? Growing eucalyptus for the first time this year?  A new post is on the blog to walk you through it.  While in theory eucalyptus is easy to grow, it's challenging in my zone 3 garden for three reasons: ⁠
⁠
➡️It needs a long time to mature⁠
➡️I have a short growing season⁠
➡️I live in a cool climate, and eucalyptus grows better when its warm.⁠
⁠
That said, you can see by this picture that it can be done!!⁠
⁠
Are you growing eucalyptus this year?
Oh friends, if any of my nice, curated photos sums Oh friends, if any of my nice, curated photos sums up how this last week went, I think it's this one.  Babies crying, trying to stay calm, outwardly looking like it's all under control, but feeling very overwhelmed.⁠
⁠
This post isn't gardening related, so feel free to scroll by if you're here only for the gardening content.⁠
⁠
Thankfully it's January, and I keep reminding myself that the Internet will not break if I don't keep to my self-imposed posting schedule.  But it doesn't make a week full of teething-and-not-sleeping baby any easier. ⁠
⁠
Felicity slept through the night for the first time ever last Monday, then proceeded to punish us with frequent wakings and terrible sleep until Saturday.  And as tough as this is in regular times, in Covid times its extra frustrating because I don't have my village.⁠
⁠
I can't just call up another Mama friend and go for coffee at her house.  I can't take my son out for a Mommy-and-Dominic date because everything he'd want to do isn't really much of an option.  There's no playgroup or play place to just drop in on.  And forget just taking everybody out to get groceries just for a change of scenery.⁠
⁠
I know people have way more serious problems than this, and I hope I don't sound whiny and entitled, it's not my intention.  Please know that I'm very grateful for my family and job and that so far we've been healthy. ⁠
⁠
A lot of you who follow me do so in part because you are also juggling life with very little people through this strange time.  I hope that in occasionally sharing my struggles, it makes you feel better about your struggles. (You're struggling too sometimes. . . right?)
Do you tend to plan out your garden to the nth deg Do you tend to plan out your garden to the nth degree, do you just wing it, or are you somewhere in-between?⁠
⁠
I tend to plan it all out, and then when I actually get out in the field, so to speak, the plan changes a little bit. ⁠
⁠
If you need a garden planner that's both pretty & practical, my garden planner is available in the ebooks section.  It's only $9 and has lots of upgrades from the previous planner.  Use code CANADA if you're Canadian to account for the exchange.⁠
⁠
P.S. You can see exactly what you're getting in the video--no surprises. ⁠
P.P.S  I get my planner bound and printed at a printing place.  Lots of people just print their own and put the sheets in a binder.
Are you gardening in containers this year? When y Are you gardening in containers this year?  When you're shopping for vegetable seeds, look for varieties that have names with words like patio, tiny, small, etc.  While lots of vegetable varieties will do fine in a container, you'll have an easier time with ones that are specifically bred for that situation.⁠
⁠
📸 by @blushbrandphotography
I'm living the pepper dream in this photo. While I'm living the pepper dream in this photo.  While these ones are a bit on the small side, who doesn't want ripe peppers in July in zone 3?!?! ⁠
⁠
Over the years I've gotten better at growing peppers, and I promise I'll spill my secrets in February when it's actually time to start them.  Until then, get yourself all or one of my four favourite varieties: ⁠
⁠
🌶️Carmen⁠
🌶️Escamillo⁠
🌶️Candy Stripe⁠
🌶️Hungarian Hot Wax⁠
⁠
Do you have a favourite pepper variety?⁠
⁠
Load More… Follow on Instagram

Theme Design By Studio Mommy · Copyright © 2021

Copyright © 2021 · Beyond Madison Theme on Genesis Framework · WordPress · Log in