SHIFTING ROOTS

home, garden, food, and prairie lifestyle

  • About
    • Contact
    • Work With Me
    • Features
    • Privacy Policy
  • Blog
  • Gardening
    • How to Start a Garden: Especially if you’re in Zone 3 or Zone 2
    • Seed Starting
    • Vegetable Gardening
    • Perennials
    • Cut Flowers
    • Small Space Gardening
  • Recipes
    • Canning
    • Preserving
    • Prairie Fruits Cookbook
    • The Best Pumpkin Recipes
    • How to Make a Tempting Christmas Cookie Tray (Plus Recipes!)
  • Popular Posts
  • E-Books
    • Pretty & Practical Garden Planner
    • Cut Flowers Made Simple
    • Constant Colour Perennial Garden
    • Small Garden, Big Harvest
    • Growing Roots Online Gardening Course
    • Frost Proof Flower Garden
    • Bouquets Made Beautiful
    • Savvy Seed Saving Annual Cut flowers
    • Prairie Fruits Cookbook
    • Online Gardening Consultations
  • Seasons
    • Christmas

How to Can Saskatoon Berries

July 17, 2020

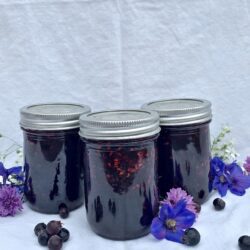
Canning Saskatoon berries is very easy and a great way to free up some freezer space when you’re preserving a lot of summer berries. If you’ve ever made jam before (or even if you haven’t), you can easily can Saskatoon berries. You can also use this basic canning method and simple syrup to can other fruits as well.

When it comes time to use your canned Saskatoon berries, all you have to do is add them directly to things like yogurt and oatmeal, or thicken them up by cooking them with a little flour or cornstarch to go in pies, tarts, and more. No need to add sugar to those recipes, since you’ve already canned them in sugar.

Here’s how to do it. . .

P.S. If you’ve never canned anything before or are still pretty new, head over to this post on canning equipment, and this one on the basic method of canning.

[Read more…]
Kristen Raney

Kristen is a former farm kid turned urban gardener who owns the popular gardening website, Shifting Roots.  She is obsessed with growing flowers and pushing the limits of what can be grown in her zone 3b garden.  She also loves to grow tomatoes, but oddly enough, dislikes eating them raw.

www.shiftingroots.com

1 Comment
Filed Under: Uncategorised Tagged: Canning, saskatoon berries, saskatoon berry

Red Hamburger Relish: The Perfect Topping for Hamburgers and Hotdogs

September 23, 2019

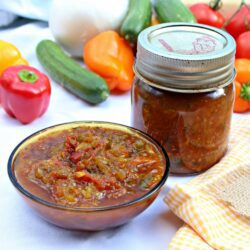
Did anyone else’s grandma make a red hamburger relish?  For those of you who have no idea what I’m talking about, red relish is sweet and tangy, made with tomatoes, cucumbers, celery & onions.

Despite owning all her recipe books, I could not find the recipe she used.

My initial google searches didn’t turn up many results.  However, once I searched hamburger relish things became more clear.

Red Hamburger relish is sweet sour and zesty! Tastes delicious on hamburgers and sausage, or any other meat. A delicious way to use your garden vegetables: cucumbers, tomatoes, zucchini, peppers, and onions. You'll come back to this easy canning recipe again and again!
[Read more…]
Kristen Raney

Kristen is a former farm kid turned urban gardener who owns the popular gardening website, Shifting Roots.  She is obsessed with growing flowers and pushing the limits of what can be grown in her zone 3b garden.  She also loves to grow tomatoes, but oddly enough, dislikes eating them raw.

www.shiftingroots.com

34 Comments
Filed Under: Harvest, Kitchen, Recipes Tagged: Canning, Cucumbers, Onions, Peppers, Preserving, recipe, Red relish, relish, Tomatoes, Zucchini

How to Can and Freeze Tomatoes when you have No Time

September 15, 2019

Every May I emerge from winter ready to conquer the world and plant an enormous garden, which may have included 27 tomato plants.  Every September I end up silently cursing my optimism.

I love canning and freezing tomatoes, but I find that tomato season in my zone 3 Saskatchewan garden always coincides with the busy back to school season in September–which means I’m short on time!

This year, I’ve come up with a better system to can and freeze tomatoes while still keeping my sanity. I’ve figured out how to make the tomato sauce and pasta sauce my family loves, all without marathon canning sessions.  Here’s how.

Preserving tomatoes by canning is great but time consuming.  Learn how to use your slow cooker, oven, and freezer to same you time this harvest.  Never waste your garden vegetables because you couldn't get to them! #gardening #tomatoes #vegetables #canning #freezing #preserving

Sort Tomatoes by Ripeness

For those of you who live in warmer climates where all your tomatoes are vine ripened, you can skip this tip.  Those of us in Saskatchewan and other USDA zone 2 or 3 areas have to pick most of our tomatoes green and ripen them indoors.

Related: Canning Guide for Beginners & Must Have Canning Supplies–and What Can Wait

Set out four (or more!) boxes and divide your tomatoes by colour and ripeness: green, yellow, orange, and red.  This way you will be able to grab the ripest box and save precious time that you could be canning. You also won’t miss any rotten tomatoes, meaning less wasted resources! 

Check your tomatoes every day or two and transfer any outliers to the correct box.

Cut your tomato processing time in half. Find out how!Click To Tweet

Cut and Prep Tomatoes Faster

I cut my tomatoes in large chunks and squeeze out the seeds.  You will not get every single seed out, so if you can’t stand any seeds in your tomato sauce, this is not the method for you.  For roma tomatoes, I cut off the top, make a small slit, squeeze out the seeds, and put them into my slow cooker whole.  Which brings me to my next point. . .

Related: Enjoy your tomatoes in Tomato Bacon Quiche or Red Relish.

Use a Slow Cooker or Instant Pot for Cooking Tomatoes Fast

I don’t know about you, but I don’t have time to sit around a stove for 3 hours ensuring my sauce doesn’t burn.  I also don’t have time to blanch and peel them.  I’m happy to deal with the odd bit of tomato skin in my sauce.

If I’m using the slow cooker, I cut up my tomatoes about 6 hours before I know I’ll have time to deal with them again.  Throw in other vegetables you want in your sauce such as onions, garlic, zucchini, carrots or squash and walk away.

Somewhere around hour 4-5 I come back and puree the sauce with a stick blender.  This ensures that my super picky small child will actually eat the sauce I make.

Let your slow cooker or oven do the heavy lifting. Process your tomatoes with less effort. Click To Tweet
Preserving tomatoes by canning is great but time consuming.  Learn how to use your slow cooker, oven, and freezer to same you time this harvest.  Never waste your garden vegetables because you couldn't get to them! #gardening #tomatoes #vegetables #canning #freezing #preserving

If you need everything done in an hour or two, then cooking your sauce in the Instant Pot is the way to go. Set your Instant Pot to the correct settings, blend when everything is cooked, and either freeze or can your sauce, whatever time allows.

Roast Tomatoes in the Oven

If a slow cooker isn’t your style, you can cut up all your veggies and roast them in the oven.  Roasting adds an extra sweet caramelized flavour that I’m a huge fan of.

Put all veggies in a large roasting pan and cook at 400 degrees for at least an hour, or until some of the tops turn a bit black.  Let cool, add spices, puree, and either can or freeze in containers.

Related: My Favourite Roasted Tomato Sauce

Can or Freeze and Done

We are short on freezer space here, so I try to can as many jars as I can.  However, I don’t always have the time or energy, so I put my sauce in smaller containers in the freezer and call it a day.  If you’re short on space, put your sauce in good quality freezer bags and freeze them flat for easier storage.

Grow the Best Tomatoes

Subscribe and get your free 10 page guide to Tomatoes. I'll show you how to start them from seed, the best care practices, and how to harvest them. Plus, you'll get 4 tomato recipes delivered straight to your inbox.

Success! Now check your email to confirm your subscription.

There was an error submitting your subscription. Please try again.

We won't send you spam. Unsubscribe at any time. Powered by ConvertKit

Zero Time?  Chop and Freeze Your Tomatoes to Can Later

Tomato season unfortunately seems to co-incide with back-to-school season, which in our house is a recipe for beautiful tomatoes going to waste.  If you find yourself with almost no time to deal, chop tomatoes in quarters or eights and freeze in plastic bags.  It’s not ideal, but you can always thaw frozen tomatoes and deal with them later.

While I haven’t tried this personally, I’ve heard that if you freeze tomatoes whole, the skins easily peel off when you thaw them.

Has trying to harvest, process, and eat your garden produce got you down?  Click here to download my free guide on what to do with the vegetables you harvest.

How do you process your tomatoes?  Any tips or tricks to add?  Let me know in the comments what your favourite method is.

Preserving tomatoes by canning is great but time consuming.  Learn how to use your slow cooker, oven, and freezer to same you time this harvest.  Never waste your garden vegetables because you couldn't get to them! #gardening #tomatoes #vegetables #canning #freezing #preserving
Kristen Raney

Kristen is a former farm kid turned urban gardener who owns the popular gardening website, Shifting Roots.  She is obsessed with growing flowers and pushing the limits of what can be grown in her zone 3b garden.  She also loves to grow tomatoes, but oddly enough, dislikes eating them raw.

www.shiftingroots.com

7 Comments
Filed Under: Gardening, Harvest, Simple & Easy, Tutorials, Use it up!, Zero Waste Tagged: can, Canning, freeze, Garden, garden harvest, garden vegetables, harvest, oven, processing, slow cooker, tomato, tomato sauce, Vegetables

Must Have Equipment for Home Canning

September 11, 2019

You’ve decided you want to start canning & preserving food at home–hurray! But if you don’t know anyone who wants to pass down their used canning equipment, the start up costs can add up. What do you absolutely need for canning? What can you live without? And what equipment is worth the money?

Here’s the best equipment for home canning, plus a few essentials for freezing and drying. I’m also sharing a few recipe books that I like and some of my resources on the blog to get you started.

Don’t want to hear about my thought process behind the choices? Scroll to the end and see my list.

This post contains affiliate links, which means that if you purchase something, I earn a small commission at no extra cost to you. Thanks for supporting Shifting Roots! You can read more about it in my Privacy Policy.

How do you start canning food at home?

If you’re brand new to canning, I recommend starting with jams, pickles, and tomato sauce. These three items all need only water bath canning, are high acidic foods, and are easy to have success with.

Stay away from beans, corn, carrots, or any food that requires a pressure cooker. Relishes, juices, and jellies are a nice intermediate-level project.

If the thought of canning is too overwhelming or you don’t have as much time as you thought you did, there’s nothing wrong with preparing your fruits and vegetables, then freezing them in freezer safe bags.

If money allows, you can vacuum seal for even longer life in the freezer.

To learn more about water bath canning, see my post on canning for beginners here. To get an idea about how to freeze fruit, see how I freeze peaches here.

  • Start with easy canning projects like jam, pickles & tomato sauce
  • Freeze fruits and vegetables instead if you’re short on time

What Equipment do I really Need for Canning?

The easiest way to get started with water bath canning is to invest in a canning kit and a few boxes of jars with lids in different sizes. I personally don’t like the canners that most of these kits come with, because they’re not tall enough for canning quart jars. This one I’ve linked is tall enough.

You’ll also want a few freezer bags for when there’s more of your recipe than can be properly canned in the jars you have. I sometimes also freeze my canning that doesn’t seal properly. I’m usually too annoyed that it didn’t seal properly the first time to go back and re-can it!

Related: The Beginners Guide to Home Canning

If you’re farther along into your canning & preserving journey, you might also want to invest in a steamer juicer and dehydrator. You can juice without a juicer (and I go into the pros and cons here), but the steamer juicer makes the nicest juice both in texture and colour.

We don’t dehydrate a lot in the fall, but we’ve used our dehydrator for making camp food for canoe trips on the river, and we like the results.

  • A canning kit and jar kit are a must-have
  • Save the steamer juicer and dehydrator for when you feel like an intermediate canner

Canning & Freezing When You’re Short on Time

It seems like every fall I have the best of intentions to can everything under the sun, but then school starts and my work commitments ramp up and I find myself unable to do as much as I hoped. In this case, the slow cooker is my friend. I can cut up that days veggies in the morning or evening, let them simmer in the slow cooker, and process them later in the day.

Or, I can just blend them up with my immersion blender and immediately put them into freezer bags.

I go into more detail about how I process tomatoes when I’m short on time here.

  • No time? The slow cooker, stick blender, and freezer bags are your friend!

Can I Use My Instant Pot for Canning?

Have you joined the Instant Pot craze yet? We got one last Christmas and I’m still getting used to it. I was very excited at the possibility of using it for canning, but as of 2019, it is not recommended to use for home canning.

Technically, it can be used for water bath canning, but because it hasn’t been tested officially yet, the official guideline is not to use it. However, you can use it to cook your tomato sauce, pumpkin puree, apple sauce or whatever you’re canning. Just use the regular canning, pressure canning, or freezing methods after your fruits or vegetables cook in the Instant Pot.

  • You can cook the fruits or vegetables in the Instant Pot, but as of 2019 it’s not safe to process them.

What are the Best Recipe Books for Canning?

I love canning and have developed a few favourite recipes over the years. Here are the ones on my site that I personally make and love.

  • Strawberry Rhubarb Jam
  • Easy Peach Jam
  • Tomato Hamburger Relish
  • Maple Spiced Crab Apple Butter
  • Crab Apple Juice

If you’d rather buy a whole recipe book on canning, here are a couple of options I like:

You can’t go wrong with the gold standard of canning recipes.

I like small batch recipes, as I garden in the city and often don’t have enough produce for canning on a large scale.

This canning guide is an older version, but I love anything that Better Homes and Gardens puts out. They always cover the basics in an easy to follow, step by step manner.

I’m also currently reading through the Home Grown Pantry by Barbara Pleasant, and it’s a wealth of basic freezing, canning, drying, and other preservation techniques. She also has some good guidelines of how much to plant so that you have enough to freeze.

Here’s a quick list of my favourite canning essentials:

Must haves:

  • 9 piece canning set
  • Wide mouth mason jars
  • Large freezer bags
  • Slow Cooker
  • Hand held immersion blender

Nice to have:

  • Steamer juicer
  • Food dehydrator
  • Instant Pot
Kristen Raney

Kristen is a former farm kid turned urban gardener who owns the popular gardening website, Shifting Roots.  She is obsessed with growing flowers and pushing the limits of what can be grown in her zone 3b garden.  She also loves to grow tomatoes, but oddly enough, dislikes eating them raw.

www.shiftingroots.com

Leave a Comment
Filed Under: Uncategorised Tagged: Canning, equipment, Preserving

The Beginners Guide to Home Canning: What You Need to Know

August 6, 2019

You’ve grown the garden, harvested the vegetables, and are dreaming of canning all that lovely produce to last over the winter.  Or maybe you’ve bought some peaches from the fruit truck, or collected raspberries from your local fruit farm.

Whatever your canning dreams are made of, canning for the first time can seem really overwhelming if you’ve never done it before.  In this post I’m breaking down the basics of canning, the equipment you need, and what kinds of recipes are the easiest to get started with.

This post contains affiliate links, which means that if you purchase something, I earn a small commission at no extra cost to you. You can learn more in my Privacy Policy. Thanks for supporting Shifting Roots!

New to Canning?  This guide will show beginners how to to water bath can with tons of little tips and tricks to make the whole process easier.  It's simple to can jams, jellies, tomatoes, salsa, peaches, and more when you use this process. #canning #beginners #tips #hacks #equipment

What Do I Need To Start Canning?

In short, you need jars, lids, a funnel, large canning pot, basket, oven mitts, and a tool to grab hot jars.  You can buy all of these items (except the jars and lids) as a kit. 

Look for a pot that is tall if you plan to can larger jars.  You’ll need something that is tall enough for water to go at least one inch over the tallest jar you plan to use.

Is Home Canning Safe?

In short, the safest way to can fruits and vegetables is to use sterilized jars and lids and can your produce in a water bath for 10-15 minutes.  (Don’t worry, I’ll explain in a little more detail, but I need to get some disclaimers out of the way first!)

You’ve probably heard of people who seal their jars in the oven, with wax, or by turning the jars upside down.  I urge you not to use these methods.  I’m sure that whoever used them has avoided food poisoning for years, but do you really want to mess with botulism?  And don’t think that “you’ll know” if your canning is tainted with it.  You can’t “taste” botulism.

Please follow your country’s guidelines for safe canning.  Here are the guidelines for Canada, USA, and Australia.

New to Canning?  This guide will show beginners how to to water bath can with tons of little tips and tricks to make the whole process easier.  It's simple to can jams, jellies, tomatoes, salsa, peaches, and more when you use this process. #canning #beginners #tips #hacks #equipment

What Foods Are Best for Canning?

Certain vegetables, like beans, are only safe if canned with a pressure cooker.  If you are a beginner canner, it is best to stick to jams, fruit, tomatoes and tomato products, and vegetables that are going to be pickled.  Here is a list of all the vegetables that are not safe to can in a water bath.

With all that out of the way, here’s the basic method for water bath canning.  If what I say differs from your country’s requirements listed above, please follow those guidelines and not mine.

P.S. If you’d rather watch the process than read about it, I show you how to make peach jam in this video:

How to Make Jam, Pickles, Tomato Sauce, and More with the Water Bath Canning Method

  1. Pick out a recipe and pick or purchase all the ingredients you’ll need.
  2. Sterilize your jars and lids. To sterilize the jars, either run them through your dishwasher and time it so that they are done and steaming by the time you need to use them, cook the empty jars in the oven for 10 minutes at 235F, or fully submerse them in boiling water for 10-15 minutes.
  3. Boil the lids and rims in a pot of water and set aside.  Make sure all your lids are free of scratches or defects.
  4. Pour your boiling hot recipe in the jars, leaving the required headspace.  Headspace is just a fancy word for the distance between the rim of the jar and the liquid in your recipe.
  5. Clean up any spills on the rim with a clean cloth.
  6. Place the lid on top and lightly screw the lid closed. 
  7. Put the jar in boiling water for 10-15 minutes.  Make sure that the jar has at least one inch of water covering it.
  8. After the 10-15 minutes, remove the jar, taking care not to tip it and keep it in an upright position.  After a few minutes, or sometimes immediately, the jar lid should make a popping sound, meaning that it has sealed.
  9. Leave the jars in the same location for a full 24 hours.
  10. Gently press on the lids.  If the lids do not move, the jar has sealed.  If you have a jar that has not sealed, put it in the fridge and eat those contents first.

Congratulations, you’ve just successfully canned!

Canning Tips for Beginners

New to Canning?  This guide will show beginners how to to water bath can with tons of little tips and tricks to make the whole process easier.  It's simple to can jams, jellies, tomatoes, salsa, peaches, and more when you use this process. #canning #beginners #tips #hacks #equipment

If you’re brand new to canning, start with a small batch of jam.  No need to get fancy, just use the recipe that comes with the pectin you purchase.

Word to the wise: don’t try to make jam without pectin the first time.  It is entirely possible, but you won’t know how long to boil the fruit, and you will probably end up with jam that is either too runny or too thick.

Once you’ve mastered jam, you can move on to pie fillings, apple butters & sauces, and juices with a juicer.  Finally, try your hand at tomato sauce, salsa, and pickles.

You can always make fridge pickles to start with if your heart is set on pickles–no canning required!

I can almost hear someone disagreeing with my list of items to can that are easier than others.  This list is just my opinion.  If you want to start with something that I think is harder, feel free!!  In the end, you should make what you love and are going to eat.

If I had to start over, I’d invest in a kit like this.

If you’re starting from scratch and need to buy all your jars, try and purchase jars that all use the exact same lids, like in this jar kit (pictured above). Then you won’t have to be scrambling to find lids of the right size for the right jar, because all your jars use the same lid.

My Favourite Canning Recipes

I love canning and have developed a few favourite recipes over the years. Here are the ones on my site that I personally make and love.

  • Strawberry Rhubarb Jam
  • Easy Peach Jam
  • Tomato Hamburger Relish
  • Maple Spiced Crab Apple Butter
  • Crab Apple Juice

If you’d rather buy a whole recipe book on canning, here are a couple of options I like:

You can’t go wrong with the gold standard of canning recipes.

I like small batch recipes, as I garden in the city and often don’t have enough produce for canning on a large scale.

This canning guide is an older version, but I love anything that Better Homes and Gardens puts out. They always cover the basics in an easy to follow, step by step manner.

Will you give canning a try? What will you can?

Kristen Raney

Kristen is a former farm kid turned urban gardener who owns the popular gardening website, Shifting Roots.  She is obsessed with growing flowers and pushing the limits of what can be grown in her zone 3b garden.  She also loves to grow tomatoes, but oddly enough, dislikes eating them raw.

www.shiftingroots.com

Leave a Comment
Filed Under: Uncategorised Tagged: Canning, jams, jellies, Preserving, water bath

  • 1
  • 2
  • 3
  • Next Page »

Grow roots with us

  • Email
  • Facebook
  • Instagram
  • Pinterest
  • Twitter
  • YouTube

Welcome!

Hi, I'm Kristen and I help new gardeners learn to grow their own vegetables and beautify their yards. I also share recipes that use all that delicious garden produce. Grab a coffee (and your gardening gloves) and join me for gardening tips, simple recipes, and the occasional DIY, all from the lovely city of Saskatoon, Saskatchewan.

P.S. First time gardener? You'll want to download the quick start gardening guide below!

Recent Posts

  • 5 Easy Ways to Increase Pollination in Your Vegetable Garden
  • Bloom Times: What Cut Flowers Grow When in Zone 3
  • The Best Vegetables & Flowers to Start with Winter Sowing
  • 21 Cut Flowers to Grow in Part Shade
  • The Best Grow Lights for Seedlings (from Budget to Bougie)

Welcome!

Hi, I’m Kristen and I help new gardeners learn to grow their own vegetables and beautify their yards. I also share recipes that use all that delicious garden produce. Grab a coffee (and your gardening gloves) and join me for gardening tips, simple recipes, and the occasional DIY, all from the lovely city of Saskatoon, Saskatchewan.

Connect with Shifting Roots On. . .

  • Email
  • Facebook
  • Instagram
  • Pinterest
  • Twitter

Find What You’re Looking For. . .

Privacy Policy

I love seeing the world through this loving boy’ I love seeing the world through this loving boy’s eyes.  Honestly, I’ve been so sick that I wasn’t really in the mood to “do Valentines Day” but there was this sweet little voice going on about how excited he was for today and how much he loves his family and I just couldn’t resist.  So whether you’re on your own, part of a couple, or in the thick of life-with-littles craziness, Happy Valentines Day!

#valentinesday2020 #mylittlevalentine #boymomlife #lifewithlittles
How do you pass a cold -28 day? By planning your How do you pass a cold -28 day?  By planning your garden, of course!  Today in my stories I’ll be going through the steps I take to start planning everything out.  I’m curious, do you start planning now or wait until the last minute?

P.S.  want your own copy of this planner?  This is the newly updated paid version and it’s on sale by itself from now until Sunday for only $5.  If you’re from Canada, use the code CANADA to make $5 USD be closer to $5 CAD.  Head over to the link in my bio to get yours.

#gardenplanning #gardenplanner #gardenersofinstagram #gardenersofig #organizedlife #organizedliving #wintergardening
Curious about growing lettuce indoors? My experim Curious about growing lettuce indoors?  My experiment is a success so far, although it’s still going to be awhile before I’m eating another salad off of them.

Okay, so maybe a little rant today.  I think sometimes in the gardening space we’re guilty of making things seem easier than they are.  Myself included.  This lettuce project is a case in point.

Was it easy?  Yes.  But will it provide me with endless salads all winter long? Nope.  Or at least not at this scale.  I’m going to estimate that I’d need at least 15 plants this size, especially since it’s winter and everything just grows slower.  And I’m the only person in my family who really eats salad.

In conclusion, this is a fun project to pass the winter, and not a truly sustainable source of lettuce.

Thoughts?

#growinglettuce #eatwhatyougrow #growwhatyoueat #wintergardening #indoorgardening #plantproject #sustainablefood #gardenersofinstagram #gardenerslife #northerngardening
Part of the mystery of seed starting is knowing ex Part of the mystery of seed starting is knowing exactly what to start when.  Every two weeks, I'll be posting these handy guides so you have enough time to order your seeds and be ready to plant when it's time for your area.  To find out when these veggies, herbs, and flowers need to be started where you live. . . ⁠
⁠
1. Search out your area's last frost date.  There are plenty of calculators on the Internet.⁠
⁠
2. Count backwards 8 weeks from that date.⁠
⁠
3. Start these seeds when that date hits.⁠
⁠
If you follow me because we're in similar zones--don't panic, it's not time yet!! I won't be starting my 10 week seeds for another two weeks, and even that is slightly on the early side. (I'm starting everything a bit early so I can hopefully plant it out before baby gets here--I won't be physically able to do it after.) I like posting the info early for followers in warmer zones and so you can save it and still have time to order/buy seeds & supplies.⁠
⁠
Which one of these are you most excited to start?⁠
⁠
#seedstarting #seedlings #homegardener #northerngardener #homesteading #urbandhomesteading #homesteadingskills #gardenlife #gardenlifestyle #startingseeds
Eeeek!!! My luffa seedlings are up!! I’m growing Eeeek!!! My luffa seedlings are up!! I’m growing the whole seed packet in hopes that a few of these little luffa babies will provide me with zero waste sponges that I can use for home cleaning, and as an exfoliant in home made beauty products.

The catch?

These plants are notoriously hard to grow, especially when you live somewhere cold with a really cold growing season—and if they get a hint of frost on them they turn to mush and all my hard work is ruined.

Gulp.

But gardeners are born optimists, so I’m giving it a shot—because you miss 100% of the shots you don’t take.

P.S. if you’re trying luffa in zone 3 like me, just basically ignore all the directions on the seed packet.  Start them immediately (two weeks ago would have been ideal) and follow along because I’ll show you exactly what to do and when.  I’ll be popping these under a grow light once the sun goes down.

#luffagourd #luffa #loofah #seedlings #seedstarting #northerngardening #northerngardener #gardenersofinstagram #gardenersofig #mygardenthismonth #gardenlife #canadiangardening
This weekend I took a big leap of faith. I came t This weekend I took a big leap of faith.  I came to New York to meet with other content creators/business owners to dig deep into what we do and create a strategy around our messaging.  I don’t even know how to properly describe what all went down, but is was incredibly life changing and I really feel connected to this tribe of women who are committed to playing to win and being the people our businesses need us to be.  I’m so excited to share what I’ve planned for my business with you in the coming months.

#playtowin #gardenblogger #businessowner #wahmlife
Is there such a thing as a no-fail houseplant? I Is there such a thing as a no-fail houseplant?  I think the Sansevera or Snake Plant or Mother-in-law’s tongue comes close.  Sure, it might be the vanilla of the plant-loving world, but it is so good for so many situations!⁠
⁠
It can handle you forgetting to water it, low light, or bright light.  It is somewhat forgiving if you are an over-waterer. ⁠
⁠
I’ve had this one for 2 or 3 years now and I keep getting rewarded with more spikes.⁠
⁠
Plant lovers, is there another houseplant you think would be perfect for beginners?⁠
⁠
#crazyplantlady #houseplantsofig #houseplantsofinstagram #snakeplant #houseplantlove
Load More… Follow on Instagram

Theme Design By Studio Mommy · Copyright © 2021

Copyright © 2021 · Beyond Madison Theme on Genesis Framework · WordPress · Log in