SHIFTING ROOTS

home, garden, food, and prairie lifestyle

  • About
    • Contact
    • Work With Me
    • Features
    • Privacy Policy
  • Blog
  • Gardening
    • How to Start a Garden: Especially if you’re in Zone 3 or Zone 2
    • Seed Starting
    • Vegetable Gardening
    • Perennials
    • Cut Flowers
    • Small Space Gardening
  • Recipes
    • Canning
    • Preserving
    • Prairie Fruits Cookbook
    • The Best Pumpkin Recipes
    • How to Make a Tempting Christmas Cookie Tray (Plus Recipes!)
  • Popular Posts
  • E-Books
    • Pretty & Practical Garden Planner
    • Cut Flowers Made Simple
    • Constant Colour Perennial Garden
    • Small Garden, Big Harvest
    • Growing Roots Online Gardening Course
    • Frost Proof Flower Garden
    • Bouquets Made Beautiful
    • Savvy Seed Saving Annual Cut flowers
    • Prairie Fruits Cookbook
    • Online Gardening Consultations
  • Seasons
    • Christmas

How to Design a Cut Flower Garden in Raised Beds

December 31, 2020

You don’t have to have acres and acres of space to grow a cut flower garden. In fact, you don’t even need a backyard. If you have a few raised beds, I can show you how to take the principles of square foot gardening and apply them to flowers instead of vegetables.

Flowers don’t need as much space between rows as you might think. In fact, when some varieties are spaced closer together, it encourages taller stem growth, which is the goal in a cut flower garden.

And to top it all off, I’ll even give you a simple raised bed cut flower plan for beginners! But before we get there, let’s go through how to set up your raised beds and what to plant.

Brand new to square foot gardening? Here’s everything you need to know to get started.

Hey there! This is me with my raised bed cut flower garden in my front yard in 2020.

Are there any flowers that can’t be grown in a raised bed?

In general, no. You can grow everything in a raised bed that you would directly in the ground. However, you need to be careful about which heights of plants you put beside each other, as they won’t have the space of a row beside them to reduce the affect of possibly being shaded out.

For example, it would be a bad idea to put a sunflower beside a bachelor’s button. Once the sunflower took off, the bachelor button wouldn’t get enough light.

Now that you know that the flower world is your oyster, here’s how to start your cut flower garden in raised beds. . .

1. Pick the Location for Your Raised Bed

Before you even order a seed or start gathering supplies for your raised bed, you need to make sure you have a spot in your yard that gets at least 8 hours of direct sunlight a day. Sure, there are some cut flowers that can handle part shade. But the bulk of the cut flowers you will want to grow are full sun flowers.

Look for any trees or buildings that might cast extra shade on the area you want to put your bed in. If you’re new to your property, you might not realize that the tree that’s bare in winter will create a lot of shade in summer once it’s filled out with leaves.

Finally, if you’re planning on putting your raised beds in a front yard, here’s a few more things to consider to keep your neighbours happy.

Four raised beds, two wood and two vinyl, with cut flowers growing in them.
You can make a decent cut flower garden in only 4 raised beds.

2. Order or Make Your Raised Bed

There are so many options for raised beds, is there really a best one?

It depends on what you value (time, ease of set up, durability, etc.) so I’ll go through some of the pros and cons.

Making your own with wood is the cheapest, and offers the most flexibility in sizes. If you’re going that route, make sure you know if your wood is treated or not, and if it is treated, make sure it is from after 2003. Previous to that date, the product used on treated wood contained chemicals that if leached into the soil were dangerous for human consumption. We personally decided to go with untreated wood for most of our boxes.

If you want to make your own raised beds, you can find plans for some here.

If you can afford cedar, it will last the longest, generally around 10-15 years, depending on your climate, before it needs to be replaced. Regular untreated wood may need replacing in as little as 3 years, but could also last as long as 10. The thicker the boards and the less exposure to moisture, the longer they will last.

Vinyl or plastic beds can vary greatly in price depending on the durability of the plastic. Cheaper and thinner plastic beds may wear out in the sun after a couple of years. Again, this really depends where you live and how intense the sun is. I would expect a cheap plastic bed in Arizona to wear out a lot sooner than a cheap plastic raised bed where I live in Saskatchewan.

I also personally own raised vinyl garden beds that are extremely thick and durable. They were expensive, but they’ve held up really well and look basically new. I’ve left them out all winter and summer long for 3 years now at this point. Unfortunately, they are not in production anymore, but if you find any like them, I’d grab them.

Finally, metal raised beds are also a great option and extremely durable. I don’t really have any personal experience with them, but I know people who have them always seem to like them and I haven’t heard of any downside.

3. Purchase Soil

Have you run across one of those posts on the Internet that says you can build a square foot garden for just $10 or some crazy cheap number? Unfortunately, that ten dollars is just a fraction of the real cost. You see, that number likely only covers the materials for the bed, and doesn’t take the soil into consideration. Sure, you could just try to work with what you have. But for most people making a raised bed, they will need to purchase soil from somewhere, and those costs can quickly add up if you’re making a larger or taller bed.

To save money and reduce your need for soil, especially in a taller bed, you can fill up the bottom with wooden logs, sticks, leaves, or other compost-type materials. Then, you fill up only the top 12-8 inches of the bed with purchased soil.

The other benefit, is that the decaying materials will produce heat, giving your flowers a warmer place to grow.

When ordering soil, it’s easiest to order what’s often referred to as Triple mix. A mix of soil, compost and peat moss. You might want to further enrich your soil with some manure or decayed leaves.

The great thing about purchased soil, is that it should contain no weed seeds. Any weeds that do come up from the wind or birds should be minimal and easy to pick.

Cream and Apricot stock flowers grown with square foot gardening in a raised bed.

4. Pick Your Flowers

Now comes the fun part! You finally get to decide what you’re going to grow for the year. We don’t have a lot of space to work with, so you want to prioritize the flowers that will give you the most bang for your buck.

That means choosing as many cut-and-come-again flowers as possible. Think zinnias, cosmos, snapdragons and marigolds. You’ll also need a good mix of flowers with different sizes and textures. While a bouquet of just large flowers is beautiful, your bouquets will look a lot more interesting if you have a mix of large and small, fillers and greens.

I go into way more detail about what will work in my two ebooks, Cut Flowers Made Simple, and Bouquets Made Beautiful.

Another thing to consider is if you are willing to seed start, or if all your seeds will be direct seeded. Most garden centres do not have cut flower seedlings available for purchase, so if you can’t or aren’t willing to seed start, it really limits your choices. For those of you in longer growing seasons, this isn’t as big of an issue. But for those of us in short growing seasons like where I live in zone 3, we really need to seed start 80% of our flowers.

If you’re a complete beginner, you’ll want to watch this video on some of the easiest cut flowers from seed to get started with:

5. Order or Purchase Seeds

You’ve decided what to plant, now where are you going to purchase the seeds? Your local garden centre will likely have a good selection for you to purchase from. Just check the labels and make sure you’re getting varieties with long stems, and not those made for containers.

I’ve compiled all my favourite places to order online in Canada, the US, and English speaking Europe, and I also have a video about where to order cut flowers in Canada.

6. Plan out the squares and Spacing

Even though I have an area in my garden that is in-ground and not in raised beds, I still manage it as if it’s a square foot garden. I divide it up into 8 different sections that function like a raised bed, and I organize my flowers in there by height.

All of your seed packets will tell you a suggested spacing for each flower, but you can usually plant your seeds a bit closer than suggested. Don’t go crazy, but for example, dahlias typically get a spacing of 18 inches, but in my square foot setup I give them 12 inches.

You can use this free plan below with all the spacing done for you, or pick your favourite flowers and make your own. Whatever you choose, just be cautious of plant heights, and that you don’t put a very tall plant beside a very short one.

Get a done-for-you raised bed cut flower garden plan

Totally free when you subscribe. You’ll also recieve helpful emails to make sure your new garden is a success.

    We respect your privacy. Unsubscribe at any time.
    Built with ConvertKit

    7. Start Seeds if Necessary

    Next, you’ll need to figure out your last frost date and when you plan to set your seedlings outdoors and direct seed. Many cut flowers are started 6-8 weeks before the last frost, but some are started as early as 12 weeks, and others can be started as late as 2 weeks before. Your seed packets will tell you what you need to know, but if you want to save yourself some time and have the seed starting schedule all set out, I lay it all out for you in Cut Flowers Made Simple.

    A week before it’s time to set your seeds out, you’ll need to harden them off (a fancy term for getting them used to life outdoors). Here’s everything you need to know about the hardening off process.

    Bouquet in a mason jar infant of a blue door.

    8. Enjoy your Square Foot Cut Flower Garden

    Once you seedlings are safely in the ground, the hardest part is over! Now you just need to keep them watered, weeded, and protected from the worst winds. Then once they start blooming, you’ll have beautiful cut flowers to make your own arrangements, or share with friends and family.


    SERIOUS ABOUT STARTING A CUT FLOWER GARDEN, BUT NEED MORE HELP?

    The Ultimate Cut Flower Bundle has everything you need! Learn exactly which flowers to grow for blooms all season long, get done-for-you plans and a system to create your own so you can grow exactly what works for you. You’ll get Cut Flowers Made Simple, Bouquets Made Beautiful, The Frost Proof Flower Garden (to extend your fall growing season) and Savvy Seed Saving, so you can save some serious money on seeds.

    It’s exactly what the beginner cut flower gardener needs to be in blooms as long as possible, and to avoid all those new-grower mistakes. It’s like your skip-to-the-front-of-the-line growing guide for every part of the cut flower growing journey. If you bought each one of these ebooks separately, it would be $60. But with the bundle, you get it all for only $39.

    You’ll EASILY grow $39 worth of flowers this year. In fact, once your garden get’s producing, you’ll grow at least 3 times that amount of flowers just in one week. Don’t wait another season and lose time to costly mistakes.

    Get your bundle here


    Kristen Raney

    Kristen is a former farm kid turned urban gardener who owns the popular gardening website, Shifting Roots.  She is obsessed with growing flowers and pushing the limits of what can be grown in her zone 3b garden.  She also loves to grow tomatoes, but oddly enough, dislikes eating them raw.

    www.shiftingroots.com

    Leave a Comment
    Filed Under: Uncategorised Tagged: cut flower gardening, cut flowers, raised beds, square foot gardening

    How to Build Beautiful Raised Beds for Square Foot Gardening

    April 6, 2020

    If you only have a small gardening space to work with, like an urban backyard, creating a raised bed garden is the best and easiest way to get started growing a garden. Raised beds have many benefits–there’s less bending, weeds are easier to manage, and they can look really pretty!

    While there are many ways to create a raised bed for your square foot garden, I love the flexibility that creating your own DIY version with wood offers you. You can stain yours a natural colour, or go with something fun like the turquoise blue I went with.

    What is the best Wood to Use for Raised Beds?

    If you decide to use treated wood, make sure to use wood treated later than 2003. Anything earlier uses harmful chemicals that will leach into your soil, adding toxins to your vegetables.

    The most natural and long-lasting option is Cedar, but where I live, cedar is extremely expensive.

    We chose to go with regular, untreated 2×6’s to create our boxes to cut down on costs.

    In the pictures for this post, we made 6 raised beds all at the same time. The supplies listed are for making one raised bed in a with 3′ by 5′ dimensions. If you’d like to make different sizes, adjust the amount of materials you need accordingly.

    Supplies

    • 4 — 8 foot 2x6s
    • 2 inch screws or nails
    • 1 8 foot Fence post
    • 4 caps (optional)
    • Wood Stain (optional)
    • Landscape fabric or cardboard
    • Mulch
    • Soil
    • Saw (or cut all boards at the hardware store if there is a cutting station).

    Directions

    Step One: Select the wood you need, picking as straight of pieces as possible, with little to no blemishes.

    Step Two: Cut the 4 2x6s into the lengths you need for your bed. We chose 3×5 beds because there is no waste when you cut, it’s easier to reach around, and just made more sense in our landscape. You could easily make 4×4 beds with no waste as well. For 3×5 beds, you would cut a 3 foot piece off of each 2×6 and instantly have your 3 foot pieces and 5 foot pieces.

    Then cut 4 two foot pieces from your fence posts.

    Step Three: These pieces can sometimes be purchased, or you can make your own by cutting 3/4 inches into the wood multiple times and chiselling out the pieces.

    Step Four: Slide the pieces into corner pieces. Nail or screw to secure if desired.

    Step Five (Optional): Secure the fancy caps to the 4 corners.

    Step Six: Stain the outside and tops of the wood if you are using regular wood. You can skip this step if you use cedar or pressure treated wood. Remember to only use pressure treated wood made after 2003.

    Step Seven: Place the beds where you want them, and lay down cardboard or landscape fabric to help prevent future weeds. Make sure any weed barrier you use for the outside also comes underneath the bed too. This will prevent annoying weeds along the sides of your bed.

    Step Eight: Add soil in the beds and mulch over the weed barriers.

    Step Nine: Enjoy the results of your hard work!

    How to Grow Vegetables in Raised Beds

    Before you click away from this page, here’s a few resources for growing vegetables in your new raised beds. While you can grow anything in a raised bed that you would in a traditional garden, its best if you use the square foot gardening method to make the most of the space you have.

    Brand new to square foot gardening? Read this post on how to get started.

    Need some ideas on what to plant? Here’s 4 free templates:

    Get 4 Free Square Foot Gardening Templates

    Start your square foot garden the easy way!

    You'll get 4 4x4 plans for

    • Salad Garden
    • Beginner's Garden
    • Salsa Garden
    • Kid's Garden

    Plus a short 3 day email course of how to get started with square foot gardening.

    Success! Now check your email to confirm your subscription.

    There was an error submitting your subscription. Please try again.

    We won't send you spam. Unsubscribe at any time. Powered by ConvertKit

    Want to see some real-life examples? Here’s how I created my front yard raised beds, other creative small space solutions around my neighbourhood, and how one couple changed an unused side yard into a raised bed garden.

    And finally, if you really want to up your small space gardening game, you’ll want to grab a copy of Small Garden, Big Harvest. It’s everything you need to maximize every available inch of growing space you have available. Grow enough produce to have something fresh from the garden every week, and feel more at peace knowing you’re contributing to your food security in some small way.

    Click here to find out more

    Pin me for later. . .

    Kristen Raney

    Kristen is a former farm kid turned urban gardener who owns the popular gardening website, Shifting Roots.  She is obsessed with growing flowers and pushing the limits of what can be grown in her zone 3b garden.  She also loves to grow tomatoes, but oddly enough, dislikes eating them raw.

    www.shiftingroots.com

    3 Comments
    Filed Under: Uncategorised Tagged: DIY, raised beds, square foot gardening, wooden

    How to Design a Front Yard Raised Bed Vegetable Garden

    February 8, 2019

    Space is at a premium in urban centres, and you might not have enough space in your backyard to plant as many vegetables as you like. But have you ever thought of going out into your front yard?

    In some neighbourhoods, the front yard space is even larger than the backyard space, and can easily help you double your available gardening space.

    If you’re thinking of starting a front yard vegetable garden, check with your city or municipality that they are allowed, ask for a line locate from your power, energy, or cable company, and start dreaming up your new raised bed vegetable garden!

    Here’s how I made over part of my front yard into a raised bed vegetable garden.

    This post contains affiliate links, which means that if you purchase anything, I earn a small commission at no extra cost to you. You can read more about it in my privacy policy.

    The Before

    Our front yard was pretty uninspiring, to say the least. In the previous year my husband constructed these cheap wooden raised beds for me because I could not fit in everything I wanted to plant in the backyard. I had even more plans to expand my vegetable garden, so the dried out potentillas had to go.

    The potentillas were so overgrown and parts of them were even starting to rot. I’m sure they were beautiful in their time, but if I was going to keep them, they were in desperate need of a good pruning because they didn’t flower very much in the summer.

    Ordering Soil and Mulch

    I’m not sure why, but the thought of ordering soil and mulch from a landscaping company seemed really overwhelming to me. However, I knew that this was too big of a project to be dragging bags of the stuff from a big box store back and forth in my truck.

    However, I went with a friend to one of the larger companies in the city and got it done!! I ordered 1 yard of pine mulch (the cheapest option) and 2 yards of soil with compost and peat already mixed in.

    I assumed that because compost and peat was already mixed in, that I wouldn’t have to make any further amendments to my soil.

    I was wrong.

    While the vegetables in the new soil performed alright, there was a noticeable difference from the ones in the soil that I had been improving with compost and manure for 3 years.

    Planting your first vegetable garden? Here’s the 10 easiest vegetables to grow, plus 6 tips I wish I would have known.

    Though these piles may seem on the small side, it still took me around 9 hours of work to move everything with a wheelbarrow to where it needed to be. Since I don’t have a driveway, I had to get it all done in one day before any of my neighbours complained to the city.

    If you are in this situation, check the city bylaws to see how long you as a homeowner can leave something like this out on a city street. In my city it’s 24 hours, but in some places it can be as short as 6 or as long as 48. If you need longer, you may have to apply for a permit.

    The moral of the story? Schedule your delivery for a day when you know you have the entire day to deal with your soil and mulch!!

    Creating My Raised Bed Vegetable Garden

    Almost finished our front yard project. The two wooden raised beds in the front will be upgraded next year!

    I filled up the raised garden beds with soil, surrounded the area with cardboard, and layered over a 4 inch layer of mulch.

    Technically, I could have left the grass, but I wanted this project to be as maintenance free and neat looking as I possibly could. I don’t want to risk getting complaints from my neighbours because I am behind on the weeding.

    The occasional weed will still come through your mulch. However, I can promise you that these weeds are super easy to pick–especially when you compare the amount of weeds you would have otherwise.

    Looking for the next cool front yard landscaping ideas?  How about a front yard vegetable garden?!  Here's how I turned my yard with no curb appeal into a low maintenance raised bed garden.  It's a simple design for a small space that anyone can do! #frontyard #design #vegetablegarden

    Another thing you should know about mulch is that you’ll have to replenish it every 2-3 years. Wooden mulch will decompose over time, making your formerly 4 inch layer not thick enough to suppress weeds. You can use cedar mulch instead if you don’t want to top up your mulch as often. However, cedar tends to be more expensive.

    The Best Method of Planting Vegetables in a Small Space Garden

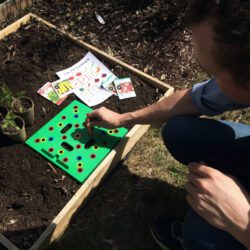
    Once the project was done, I planted my new raised beds using the square foot gardening method and the seeding square. (You can also get it on Amazon here.)

    If you’re used to traditional rows in a garden, it can seem very strange to switch to this way of planting a garden. But once you try it, you’ll be hooked! You’ll be able to plant more vegetables in the same space and keep down the weeds much easier.

    In fact, I found that once I had done the initial major weeding in June, there was barely any weeds after that, and it was easy to simply pull out the few that did manage to come up.

    If you need ideas on square foot gardening, I have these 4 free templates (that are colour co-ordinated with the seeding square) that you might enjoy. If you don’t want to use the seeding square, you can figure out the spacing by using Mel Bartholomew’s book. (But seriously, you’ll save so much time and headache with the Seeding Square!!)

    Get 4 Free Square Foot Gardening Templates

    Start your square foot garden the easy way!

    You'll get 4 4x4 plans for

    • Salad Garden
    • Beginner's Garden
    • Salsa Garden
    • Kid's Garden

    Plus a short 3 day email course of how to get started with square foot gardening.

    Success! Now check your email to confirm your subscription.

    There was an error submitting your subscription. Please try again.

    We won't send you spam. Unsubscribe at any time. Powered by ConvertKit
    Looking for the next cool front yard landscaping ideas?  How about a front yard vegetable garden?!  Here's how I turned my yard with no curb appeal into a low maintenance raised bed garden.  It's a simple design for a small space that anyone can do! #frontyard #design #vegetablegarden

    In the bed on the right, should not have planted that pepper between the artichokes. I had never grown artichokes before, and had no concept of how tall they would actually get. (3-5 feet!) Needless to say, the pepper did not do well.

    I also did not realize that butternut squash and watermelon would cross with each other. I was blessed with some lovely mutant squash. What do you get when you cross a butternut with a watermelon? A very weird squash that you really don’t want to eat!!

    A Front Yard Vegetable Garden Builds Community

    Overall, I was really happy with my front yard vegetable garden. It was easy to keep up with and I would often notice people who were walking by enjoying it.

    Neighbours would often stop by to chat about the garden, and perfect strangers would stop their walk to ask me questions about the garden if I was outside working on it.

    I was a bit nervous about possible theft come harvest time, but so far it has not been a problem.

    Looking for the next cool front yard landscaping ideas?  How about a front yard vegetable garden?!  Here's how I turned my yard with no curb appeal into a low maintenance raised bed garden.  It's a simple design for a small space that anyone can do! #frontyard #design #vegetablegarden

    In fact, my biggest problem was actually the birds that mercilessly picked at any lettuce, kale, beets, and swiss chard that I planted. Next year I will protect my plants with cloth until they are well established.

    Looking for the next cool front yard landscaping ideas?  How about a front yard vegetable garden?!  Here's how I turned my yard with no curb appeal into a low maintenance raised bed garden.  It's a simple design for a small space that anyone can do! #frontyard #design #vegetablegarden

    By late summer, the garden was very productive and my mutant butternut squash/watermelon vines had taken over. All in all, I’d say my front yard raised bed vegetable garden project was a huge success!

    Recommended Resources

    If you’re looking to plan your own front yard project, here are a few resources I recommend:

    • Mel Bartholomew’s 3rd Edition Square Foot Gardening Book.
    • The Seeding Square, on the product site, or on Amazon.
    • The Edible Front Yard Book by Ivette Soler
    • A Three-pack, 4×4 Raised Bed Garden Kit
    • Or this tiered wooden option
    • Or just a basic wooden raised bed.
    Looking for the next cool front yard landscaping ideas?  How about a front yard vegetable garden?!  Here's how I turned my yard with no curb appeal into a low maintenance raised bed garden.  It's a simple design for a small space that anyone can do! #frontyard #design #vegetablegarden

    P.S. If you’re a new gardener and looking for hold-your-hand-virtual gardening advice, my new online gardening course is for you!

    Kristen Raney

    Kristen is a former farm kid turned urban gardener who owns the popular gardening website, Shifting Roots.  She is obsessed with growing flowers and pushing the limits of what can be grown in her zone 3b garden.  She also loves to grow tomatoes, but oddly enough, dislikes eating them raw.

    www.shiftingroots.com

    3 Comments
    Filed Under: Curb Appeal, Gardening, Landscaping Tagged: front yard, landscaping, raised beds, raised vinyl beds, square foot gardening, vegetable garden, vegetable gardening

    An Honest Review of My Raised Garden Vinyl Beds

    May 22, 2018

    This post is sponsored by Raised Garden Vinyl Beds.  I received free and discounted product in exchange for my honest opinion of their product.  This post also contains affiliate links, which means if you purchase something using one of my links, I make a bit of extra coffee money at no extra cost to you.  Thanks for supporting Shifting Roots!

    Last summer I made my first foray into the world of square foot gardening.  I didn’t know exactly what I was doing, but those raised garden beds I kept seeing everywhere on Pinterest intrigued me.

    My husband and I knew we’d be making some changes to the yard, but we weren’t sure exactly how much we could do in one summer, so we decided to make our raised beds cheap and cheerful.  That way, if we decided to change things we weren’t committed.

    We built ours out of thin wood and filled them up with soil.  They looked great and did the job beautifully.  However, I began having doubts when the nails were starting to come out of one of them in the fall.

    We just built the things, and they were already falling apart?

    A Raised Garden Bed that’s Built to Last

    Once the snow melted it was clear that our sad little wooden beds weren’t going to last much more than one more year.  The wood was starting to warp and the nails looked weak in another bed.

    To be fair, we could have built them a little better.  However, last year when I interviewed my friends Graham and Sarah about their yard, their built-with-better-wood ones were falling apart after 3 years.

    That’s why when I saw an ad for Raised Vinyl Garden Beds on Facebook, I had to check it out.  The beds looked like they were built to last and the company was local–win-win!!

    P.S.–Raised Vinyl Garden Beds ship to Canada and the U.S., so you can get yours even if you don’t live in Saskatoon and area.

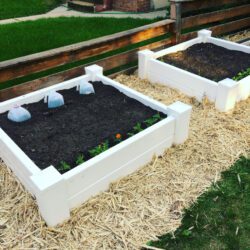
    Almost finished our front yard project. The two wooden raised beds in the front will be upgraded next year!

    Get Your Vinyl Raised Garden Bed Set Up in 30 minutes–No Joke!

    I chose two of the 4×4 premium beds.  I’ll be investing in a third and replacing the two sad wooden ones in my yard next year.

    The beds are fairly easy to put together, and it took me less than 30 minutes.  It actually took me longer to look for a cordless drill, give up, and find the screwdriver.

    I had a little trouble keeping everything square, but with the second one I screwed in one of the corners first, then assembled everything and it was no problem.

    The directions say that you can use a screwdriver, but I highly recommend a cordless drill.  I couldn’t find ours and ended up using a battery operated screwdriver.  It worked well, but I had to push quite hard to get the screws to go in the vinyl.  I know a cordless drill would have required little effort.

    I love my vinyl raised beds in my front yard.  They make square foot gardening so easy!  I'll show you how I make it work in my small space, plus give you some ideas and plans for what to plant in it. #raisedbeds #squarefootgardening #containergardening #beginnergardening #easygardening #gardening #vegetablegardening

    Related: 8 Reasons You Should Start Square Foot Gardening

    If you’re ordering soil for your beds, I recommend getting a mix of soil, compost, and peat moss.  Your landscaping centre will likely call it something like garden bed mix.  I found that one bed used up around 1/2 a yard of soil.

    Once my beds were set up it was time for the fun part–planting!

    Planting is Easy and Fun with a Raised Bed

    The beds are 3 1/2 feet by 3 1/2 feet on the inside.  I used the seeding square to measure out and plant my garden, so I was left with a six inch strip on two of the edges.  This was great, because I got in an extra row of marigolds and lettuce.

    Here’s what I planted in one of mine.  Feel free to download the image and plant the same in your own!  You can also download 4 more planting templates here.

    I love my vinyl raised beds in my front yard.  They make square foot gardening so easy!  I'll show you how I make it work in my small space, plus give you some ideas and plans for what to plant in it. #raisedbeds #squarefootgardening #containergardening #beginnergardening #easygardening #gardening #vegetablegardening

    Related: The Best Vegetables for Beginners & How to Get Started Gardening Fast

    I am loving gardening in my new vinyl raised beds.  I don’t have to bend as much, they look fantastic, and have serious curb appeal.  I’ve noticed quite a few people check them out as they’re walking by our front yard, and had a few ask me where I got mine.

    They’re really sturdy and kid friendly, so I don’t have to worry about them falling apart if they get sat on, or my son getting splinters in his fingers if he tries to help me.

    I love my vinyl raised beds in my front yard.  They make square foot gardening so easy!  I'll show you how I make it work in my small space, plus give you some ideas and plans for what to plant in it. #raisedbeds #squarefootgardening #containergardening #beginnergardening #easygardening #gardening #vegetablegardening

    Low Maintenance?  How about NO Maintenance!

    Best of all, I will never have to build them again.  Because let’s be honest–who really wants to spend a weekend rebuilding your raised bed every 3-5 years, plus staining them every year?  You might have the best of intentions now, but there’s something seriously demoralizing about rebuilding something you’ve previously built.  Cedar is so expensive these days, that depending on how you build the bed, the cost is very similar to vinyl.

    I don’t know about you, but I’d rather be planting my garden or enjoying time in the sun instead of adding yet another project to my to-do list.

    Raised Garden Vinyl Beds come with a lifetime warranty, so they will look good today and 25 years from today.  Even cedar can’t do that.

    Want to get your own?  Let me make the deal a little sweeter.  When you send me a copy of your Raised Garden Vinyl Bed receipt, I will give you my beginner gardening course for free–a $50 value!

    Pin me for later:

    I love my vinyl raised beds in my front yard.  They make square foot gardening so easy!  I'll show you how I make it work in my small space, plus give you some ideas and plans for what to plant in it. #raisedbeds #squarefootgardening #containergardening #beginnergardening #easygardening #gardening #vegetablegardening


    Kristen Raney

    Kristen is a former farm kid turned urban gardener who owns the popular gardening website, Shifting Roots.  She is obsessed with growing flowers and pushing the limits of what can be grown in her zone 3b garden.  She also loves to grow tomatoes, but oddly enough, dislikes eating them raw.

    www.shiftingroots.com

    6 Comments
    Filed Under: Gardening, Sponsored Tagged: Gardening, raised beds, raised vinyl beds, raised vinyl garden beds, square foot gardening

    8 Reasons to Start Square Foot Gardening in Your Backyard

    May 13, 2018

    Have you been scrolling on Pinterest lately, oo-ing and ah-ing over all those beautiful raised beds you see with perfectly spaced plants?  It’s called square foot gardening and it’s the perfect solution for those of us with a small space to garden in, or anyone who wants to have a more low-maintenance garden.

    This post contains affiliate links, which means that I make a small commission at no extra cost to you if you purchase an item from any one of these links.  You can read more about it in my disclosure policy.  Thanks for supporting Shifting Roots!

    The square foot gardening method was created by an engineer, Mel Bartholomew in the 1980’s.  You can learn more about it in this video, or purchase his book, All New Square Foot Gardening, Third Edition: The Revolutionary Way to Grow More In Less Space.  I’ve personally read and love it, and it’s what has convinced me that this is the best way to grow my vegetable garden.

    Curious?  I’ll give you 8 good reasons why you should try it this gardening season.

    [Read more…]

    Kristen Raney

    Kristen is a former farm kid turned urban gardener who owns the popular gardening website, Shifting Roots.  She is obsessed with growing flowers and pushing the limits of what can be grown in her zone 3b garden.  She also loves to grow tomatoes, but oddly enough, dislikes eating them raw.

    www.shiftingroots.com

    1 Comment
    Filed Under: Gardening, Seeding Square Tagged: Gardening, raised beds, seeding square, square foot gardening, vegetable gardening

    Grow roots with us

    • Email
    • Facebook
    • Instagram
    • Pinterest
    • Twitter
    • YouTube

    Welcome!

    Hi, I'm Kristen and I help new gardeners learn to grow their own vegetables and beautify their yards. I also share recipes that use all that delicious garden produce. Grab a coffee (and your gardening gloves) and join me for gardening tips, simple recipes, and the occasional DIY, all from the lovely city of Saskatoon, Saskatchewan.

    P.S. First time gardener? You'll want to download the quick start gardening guide below!

    Recent Posts

    • Protected: 5 Easy Ways to Increase Pollination in Your Vegetable Garden
    • Bloom Times: What Cut Flowers Grow When in Zone 3
    • The Best Vegetables & Flowers to Start with Winter Sowing
    • 21 Cut Flowers to Grow in Part Shade
    • The Best Grow Lights for Seedlings (from Budget to Bougie)

    Welcome!

    Hi, I’m Kristen and I help new gardeners learn to grow their own vegetables and beautify their yards. I also share recipes that use all that delicious garden produce. Grab a coffee (and your gardening gloves) and join me for gardening tips, simple recipes, and the occasional DIY, all from the lovely city of Saskatoon, Saskatchewan.

    Connect with Shifting Roots On. . .

    • Email
    • Facebook
    • Instagram
    • Pinterest
    • Twitter

    Find What You’re Looking For. . .

    Privacy Policy

    I love seeing the world through this loving boy’ I love seeing the world through this loving boy’s eyes.  Honestly, I’ve been so sick that I wasn’t really in the mood to “do Valentines Day” but there was this sweet little voice going on about how excited he was for today and how much he loves his family and I just couldn’t resist.  So whether you’re on your own, part of a couple, or in the thick of life-with-littles craziness, Happy Valentines Day!

#valentinesday2020 #mylittlevalentine #boymomlife #lifewithlittles
    How do you pass a cold -28 day? By planning your How do you pass a cold -28 day?  By planning your garden, of course!  Today in my stories I’ll be going through the steps I take to start planning everything out.  I’m curious, do you start planning now or wait until the last minute?

P.S.  want your own copy of this planner?  This is the newly updated paid version and it’s on sale by itself from now until Sunday for only $5.  If you’re from Canada, use the code CANADA to make $5 USD be closer to $5 CAD.  Head over to the link in my bio to get yours.

#gardenplanning #gardenplanner #gardenersofinstagram #gardenersofig #organizedlife #organizedliving #wintergardening
    Curious about growing lettuce indoors? My experim Curious about growing lettuce indoors?  My experiment is a success so far, although it’s still going to be awhile before I’m eating another salad off of them.

Okay, so maybe a little rant today.  I think sometimes in the gardening space we’re guilty of making things seem easier than they are.  Myself included.  This lettuce project is a case in point.

Was it easy?  Yes.  But will it provide me with endless salads all winter long? Nope.  Or at least not at this scale.  I’m going to estimate that I’d need at least 15 plants this size, especially since it’s winter and everything just grows slower.  And I’m the only person in my family who really eats salad.

In conclusion, this is a fun project to pass the winter, and not a truly sustainable source of lettuce.

Thoughts?

#growinglettuce #eatwhatyougrow #growwhatyoueat #wintergardening #indoorgardening #plantproject #sustainablefood #gardenersofinstagram #gardenerslife #northerngardening
    Part of the mystery of seed starting is knowing ex Part of the mystery of seed starting is knowing exactly what to start when.  Every two weeks, I'll be posting these handy guides so you have enough time to order your seeds and be ready to plant when it's time for your area.  To find out when these veggies, herbs, and flowers need to be started where you live. . . ⁠
⁠
1. Search out your area's last frost date.  There are plenty of calculators on the Internet.⁠
⁠
2. Count backwards 8 weeks from that date.⁠
⁠
3. Start these seeds when that date hits.⁠
⁠
If you follow me because we're in similar zones--don't panic, it's not time yet!! I won't be starting my 10 week seeds for another two weeks, and even that is slightly on the early side. (I'm starting everything a bit early so I can hopefully plant it out before baby gets here--I won't be physically able to do it after.) I like posting the info early for followers in warmer zones and so you can save it and still have time to order/buy seeds & supplies.⁠
⁠
Which one of these are you most excited to start?⁠
⁠
#seedstarting #seedlings #homegardener #northerngardener #homesteading #urbandhomesteading #homesteadingskills #gardenlife #gardenlifestyle #startingseeds
    Eeeek!!! My luffa seedlings are up!! I’m growing Eeeek!!! My luffa seedlings are up!! I’m growing the whole seed packet in hopes that a few of these little luffa babies will provide me with zero waste sponges that I can use for home cleaning, and as an exfoliant in home made beauty products.

The catch?

These plants are notoriously hard to grow, especially when you live somewhere cold with a really cold growing season—and if they get a hint of frost on them they turn to mush and all my hard work is ruined.

Gulp.

But gardeners are born optimists, so I’m giving it a shot—because you miss 100% of the shots you don’t take.

P.S. if you’re trying luffa in zone 3 like me, just basically ignore all the directions on the seed packet.  Start them immediately (two weeks ago would have been ideal) and follow along because I’ll show you exactly what to do and when.  I’ll be popping these under a grow light once the sun goes down.

#luffagourd #luffa #loofah #seedlings #seedstarting #northerngardening #northerngardener #gardenersofinstagram #gardenersofig #mygardenthismonth #gardenlife #canadiangardening
    This weekend I took a big leap of faith. I came t This weekend I took a big leap of faith.  I came to New York to meet with other content creators/business owners to dig deep into what we do and create a strategy around our messaging.  I don’t even know how to properly describe what all went down, but is was incredibly life changing and I really feel connected to this tribe of women who are committed to playing to win and being the people our businesses need us to be.  I’m so excited to share what I’ve planned for my business with you in the coming months.

#playtowin #gardenblogger #businessowner #wahmlife
    Is there such a thing as a no-fail houseplant? I Is there such a thing as a no-fail houseplant?  I think the Sansevera or Snake Plant or Mother-in-law’s tongue comes close.  Sure, it might be the vanilla of the plant-loving world, but it is so good for so many situations!⁠
⁠
It can handle you forgetting to water it, low light, or bright light.  It is somewhat forgiving if you are an over-waterer. ⁠
⁠
I’ve had this one for 2 or 3 years now and I keep getting rewarded with more spikes.⁠
⁠
Plant lovers, is there another houseplant you think would be perfect for beginners?⁠
⁠
#crazyplantlady #houseplantsofig #houseplantsofinstagram #snakeplant #houseplantlove
    Load More… Follow on Instagram

    Theme Design By Studio Mommy · Copyright © 2021

    Copyright © 2021 · Beyond Madison Theme on Genesis Framework · WordPress · Log in