SHIFTING ROOTS

home, garden, food, and prairie lifestyle

  • About
    • Contact
    • Work With Me
    • Features
    • Privacy Policy
  • Blog
  • Gardening
  • Recipes
  • Popular Posts
  • Courses

No Churn Cherry Cheesecake Ice Cream

June 16, 2017

Pin768
Share1
Tweet
769 Shares

Every summer, my family searched high and low for a coveted box of New York Cherry Cheesecake ice cream.  Not just any grocery store would carry it, and even the ones that did didn’t always have it in stock.

It was the small-town-holy-grail of ice cream.

When I was in grade three we managed to secure a box during a sleepover with my best friend.  We happily devoured the ice cream, fearing no consequence.  Unfortunately, the next day I woke up with small red spots all over my body.

“Yikes, must have been the cherry cheese cake ice cream we ate last night.  Maybe you’re allergic.” proclaimed my concerned nine-year-old friend.

I felt itchy all over as I imagined my fate without my favourite ice cream.

Turned out, it was chicken pox.

While I’m positive that the ice cream had nothing to do with chicken pox, it is a fun memory that I always think of when I eat this ice cream.

What hasn’t changed?  New York Cherry Cheesecake ice cream is still hard to find in Saskatchewan.  (Thank you Twisted Sisters in Chamberlain, SK for carrying it!!)

I set out to make my own.

No-churn Cherry Cheesecake Ice Cream is the perfect summer treat! Whip up this homemade recipe in no time and have your kids begging for more.

A Sweet Dillema

The problem with making ice cream is that it usually involves expensive equipment.  Yes, I own a kitchen aid mixer, but do I really want to pay $200 for the ice cream maker attachment?

No thank you.

Thankfully, you don’t have to own any fancy equipment to make your own version of the coveted New York Cherry Cheesecake ice cream.  All you need is a large bread pan, mixer, and some patience while the ice cream freezes.

Trust me, the patience part is hard!!

No-churn Cherry Cheesecake Ice Cream is the perfect summer treat! Whip up this homemade recipe in no time and have your kids begging for more.

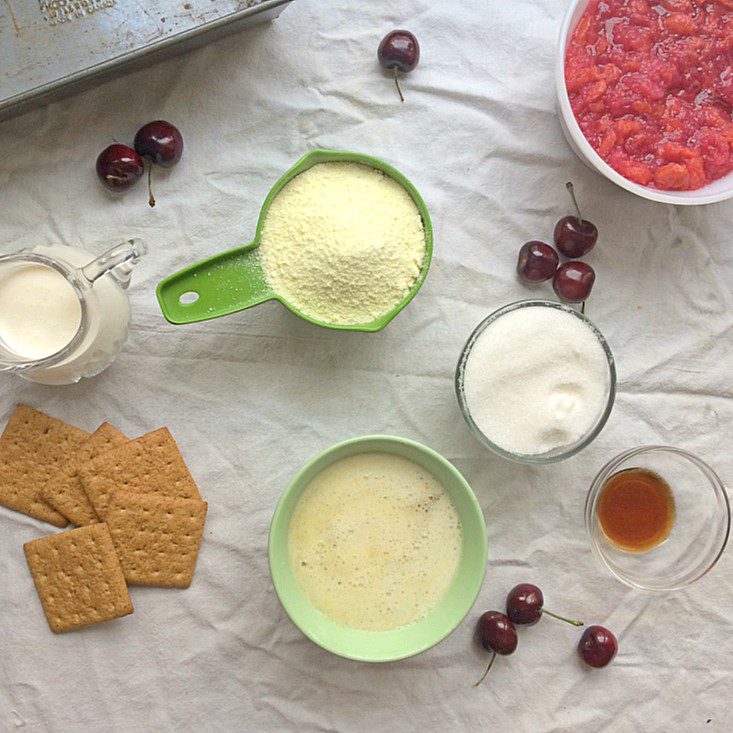
In theory, you could make this recipe with 5 ingredients and be done with it.  However, I like to make my own sweetened condensed milk because its cheaper and I can control the sugar.  Prepared pie filling from a can is obviously easier, but a quick homemade version is way tastier.

Related: Cheesecake Brownie Bites

No-churn Cherry Cheesecake Ice Cream is the perfect summer treat! Whip up this homemade recipe in no time and have your kids begging for more.

No Churn, No Problem

I already had frozen pie filling from last summer’s sour cherries on hand in my freezer.  If you’re using fresh cherries, you can make your own quick pie filling with cornstarch and sugar.

Related: The Best Sour Cherry Pie

Good Ice Cream Takes Time

Unfortunately, this ice cream has a lot of steps.  You have to whip the cream, then the sweetened condensed milk, and then the cream cheese.  I’ll be experimenting in the coming months to see if I can get the amount-of-dishes-dirtied down without sacrificing the texture.

If you make your own sweetened condensed milk, you might end up with a grainier texture than the stuff you buy in the store.  Fear not.  Any graininess will be gone once the ice cream freezes.

No-churn Cherry Cheesecake Ice Cream is the perfect summer treat! Whip up this homemade recipe in no time and have your kids begging for more.

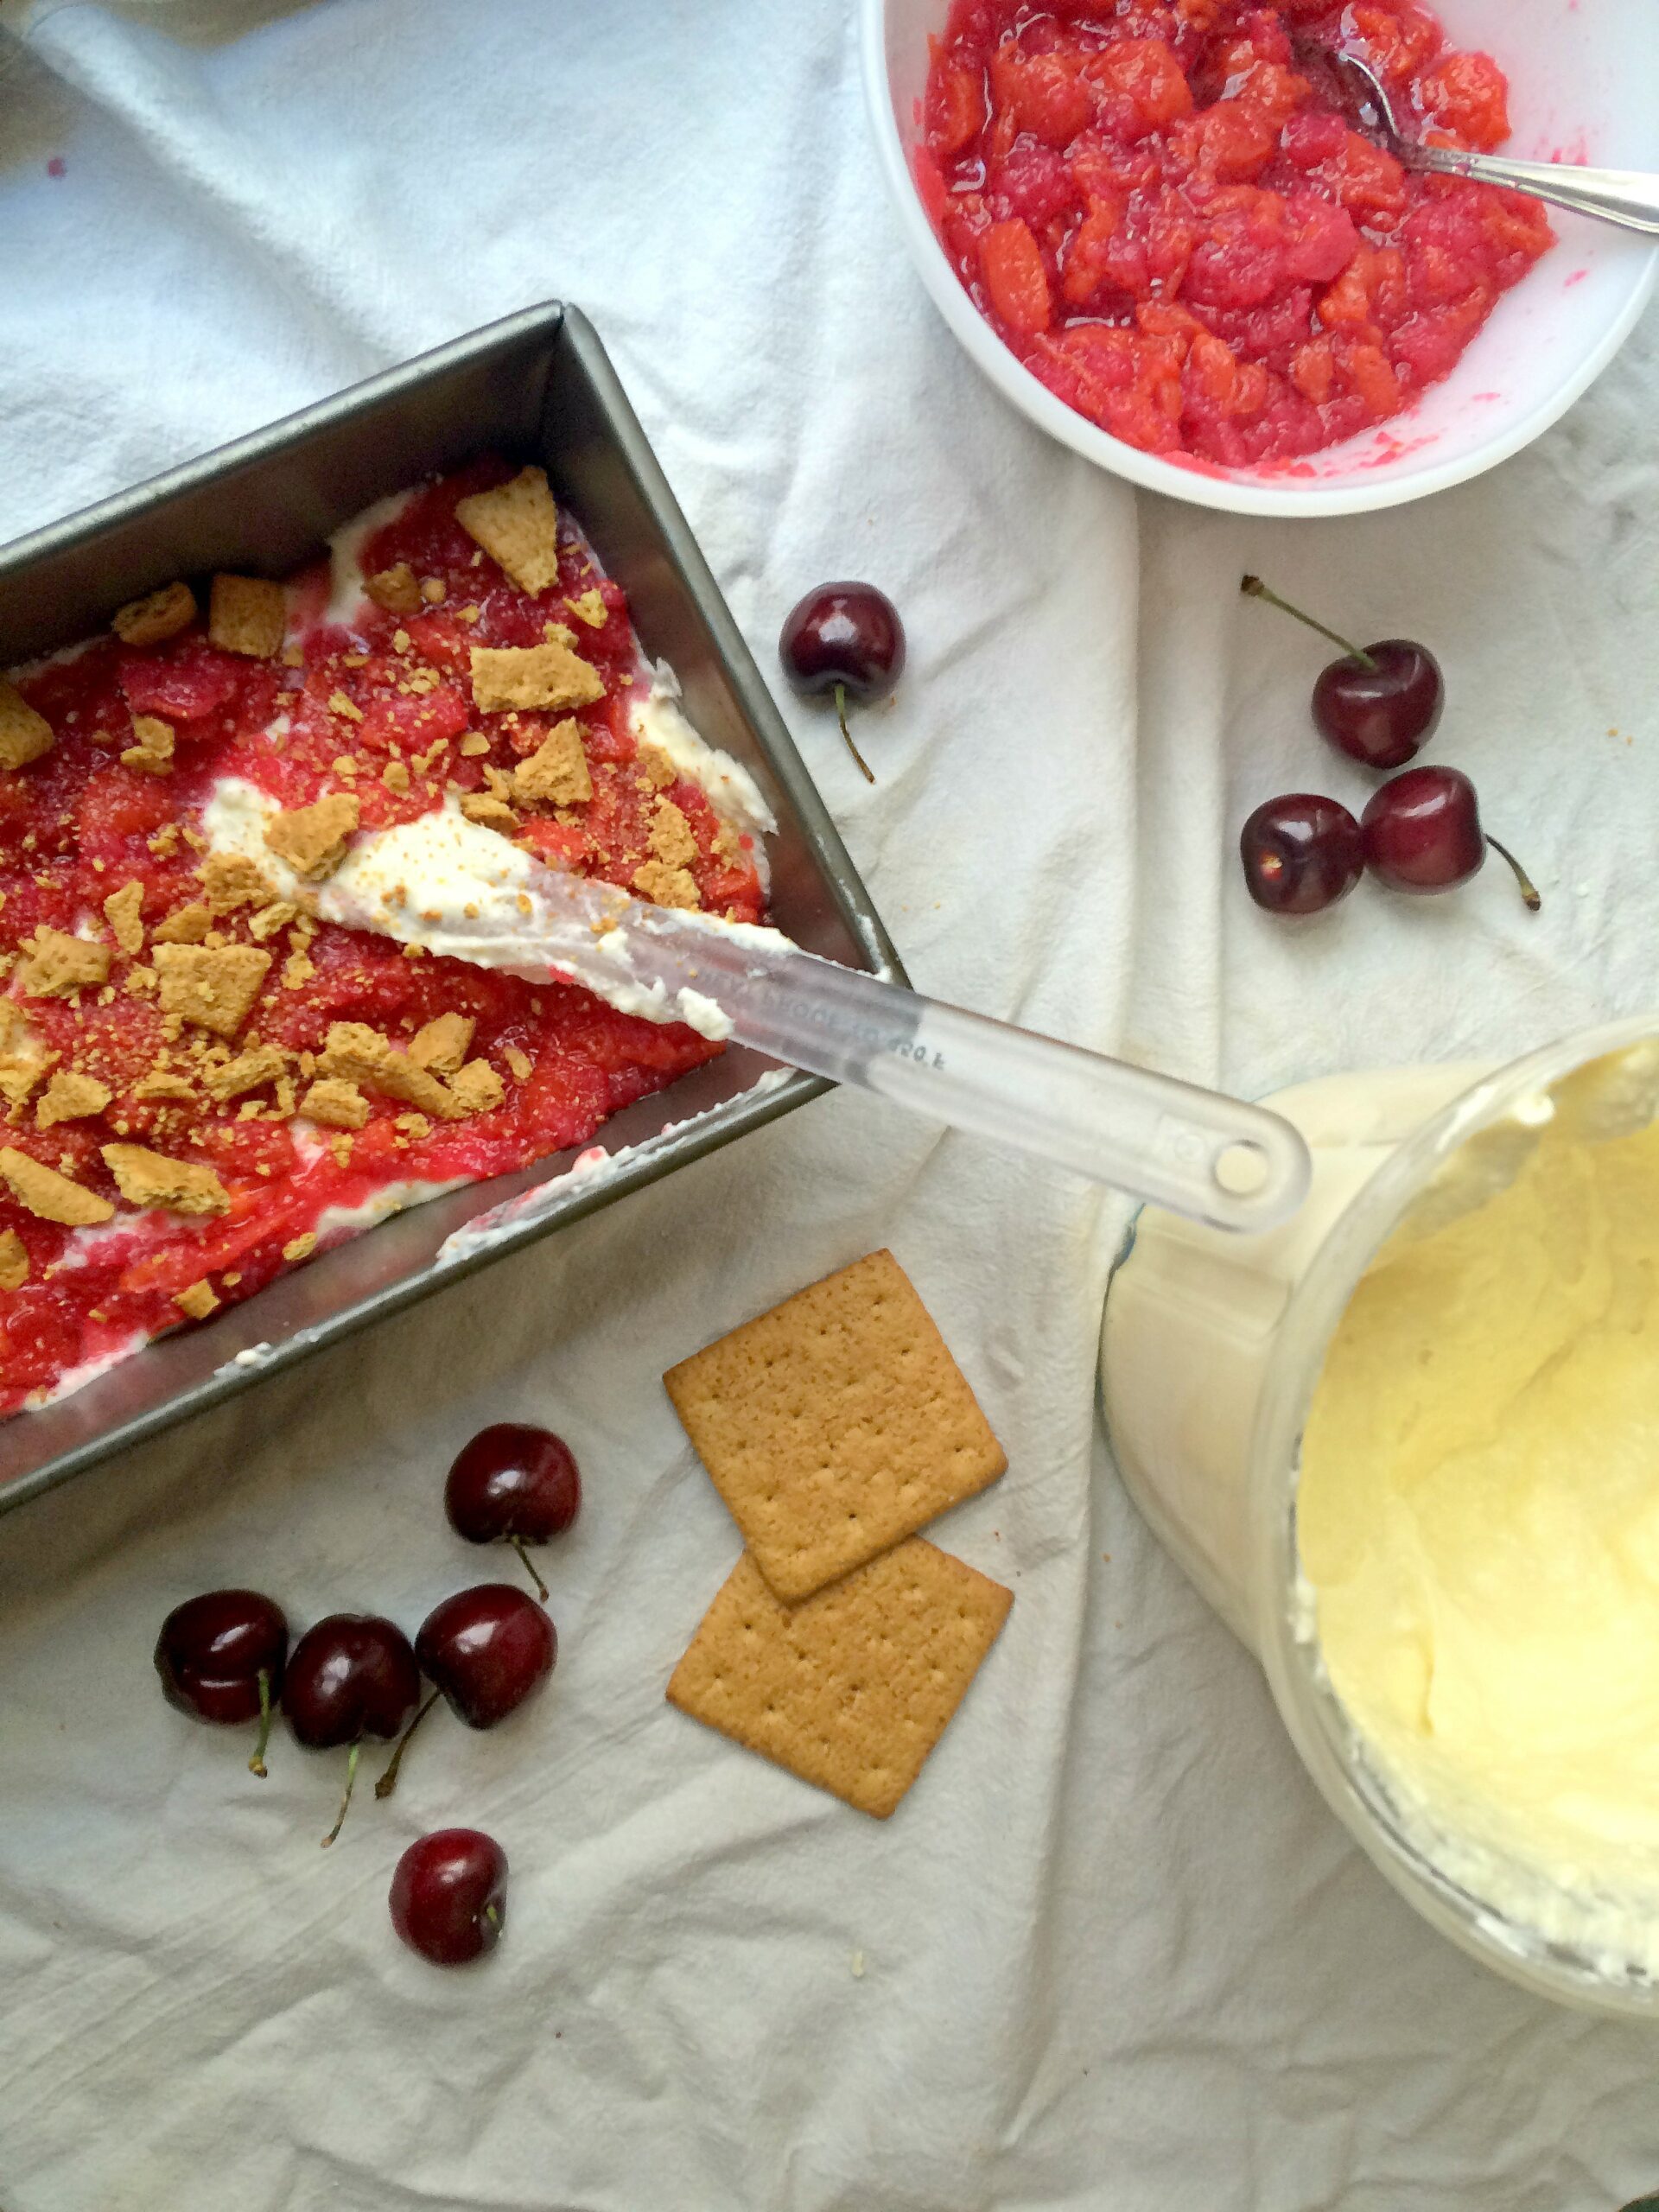
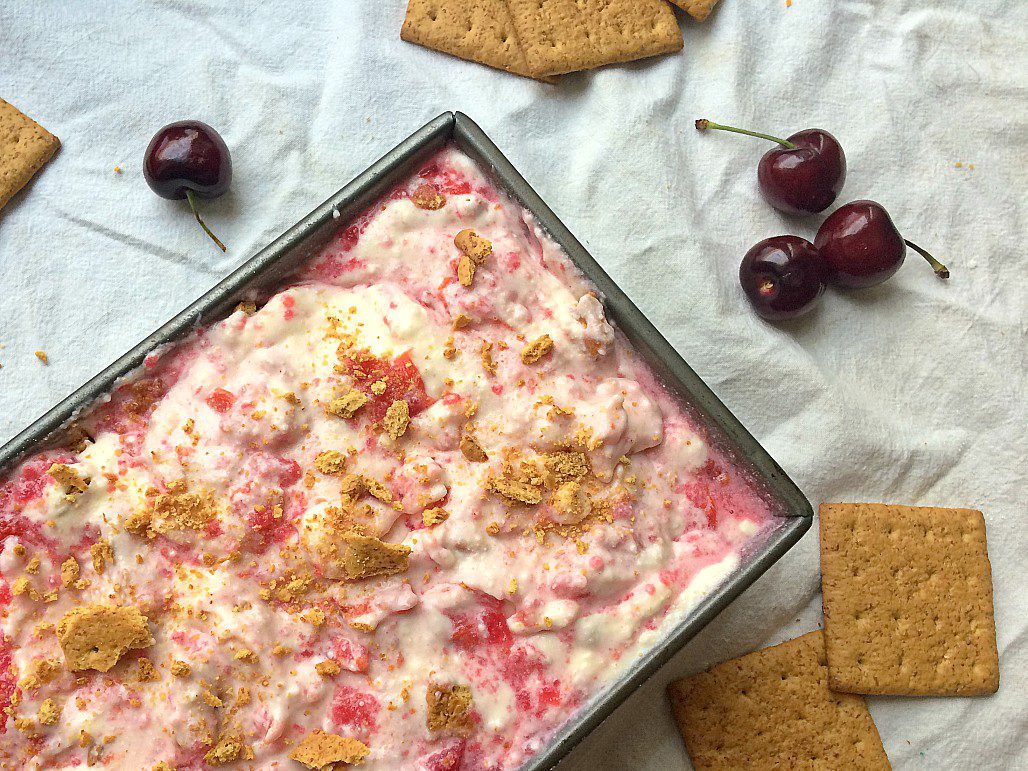
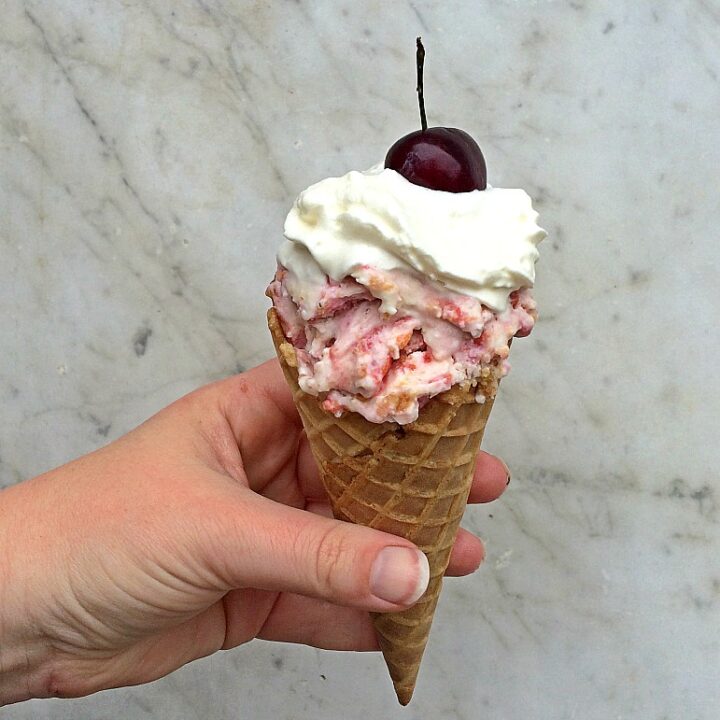
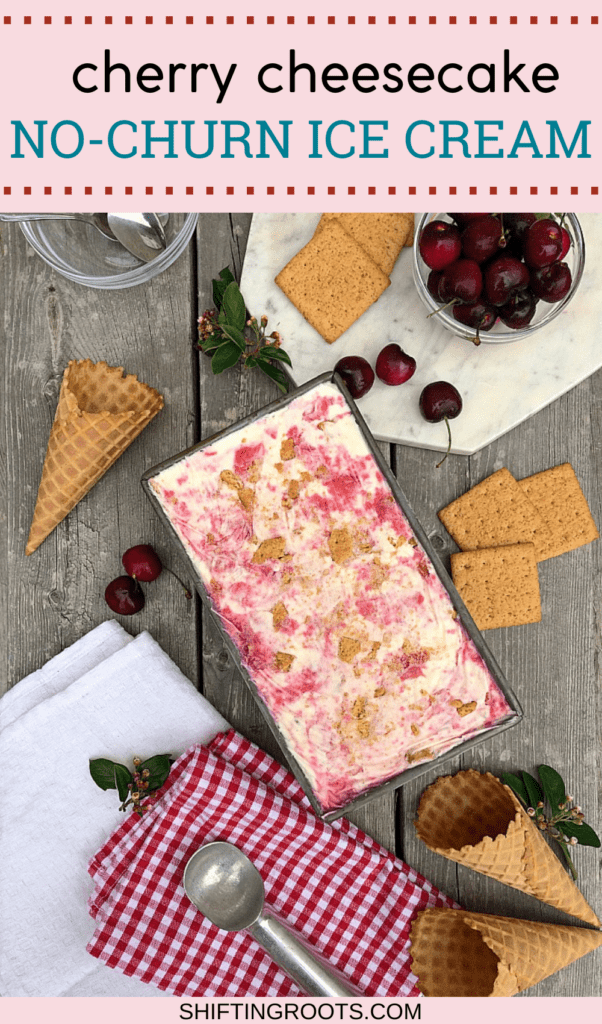
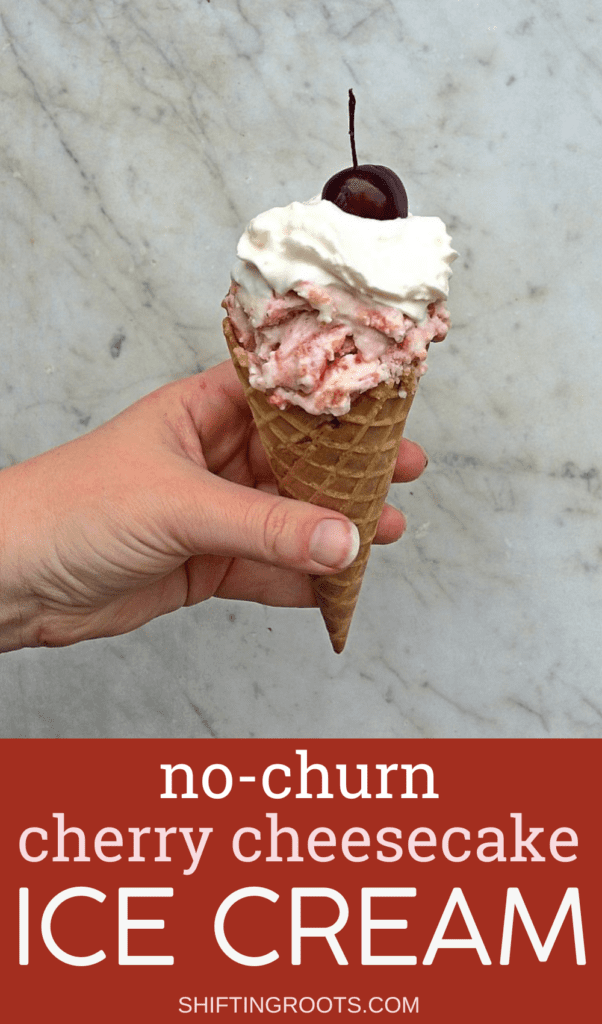
The whipped cream, sweetened condensed milk and cream cheese combine to form the ice cream base.  Spread half the mixture in the large bread pan.  Put half of your cherry pie filling overtop and crumble two graham crackers.

Repeat the process.

Related: The Prettiest Saskatoon Berry Cheesecake

No-churn Cherry Cheesecake Ice Cream is the perfect summer treat! Whip up this homemade recipe in no time and have your kids begging for more.

Mix with a spatula and top with one more crumbled graham cracker for presentation.  Put a piece of plastic wrap over the ice cream and freeze overnight.

When I was researching the no-churn method, some blogs said you could eat the ice cream in as little as six hours.  I found that mine was not ready, but I think it depends on your particular freezer.

For the record, ours is old and decrepit.

No-churn Cherry Cheesecake Ice Cream is the perfect summer treat! Whip up this homemade recipe in no time and have your kids begging for more.

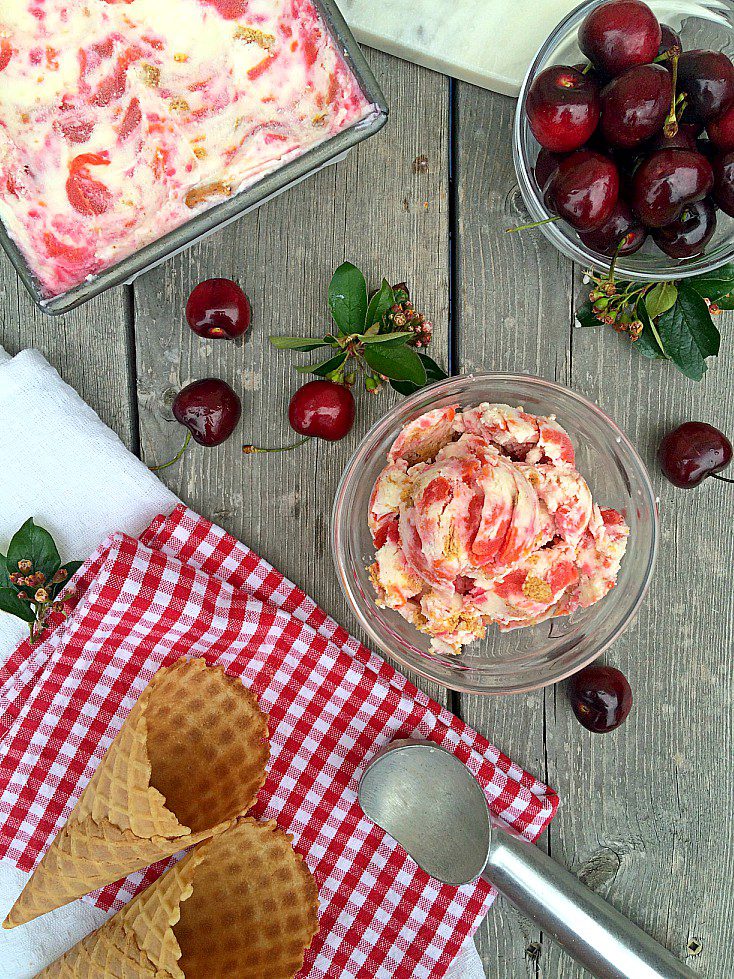
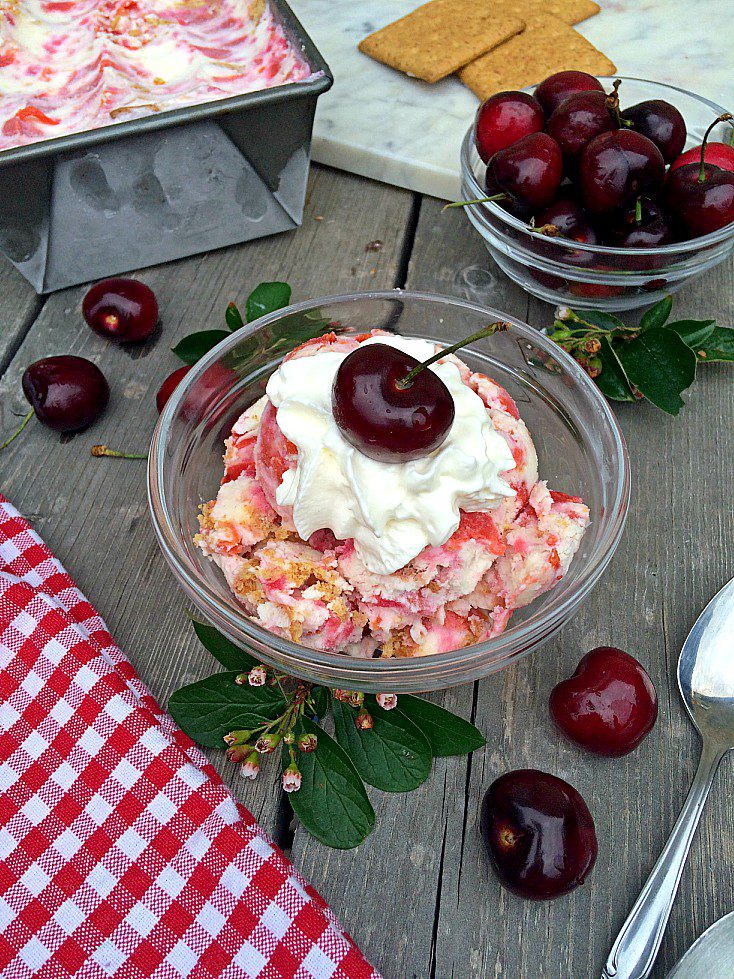
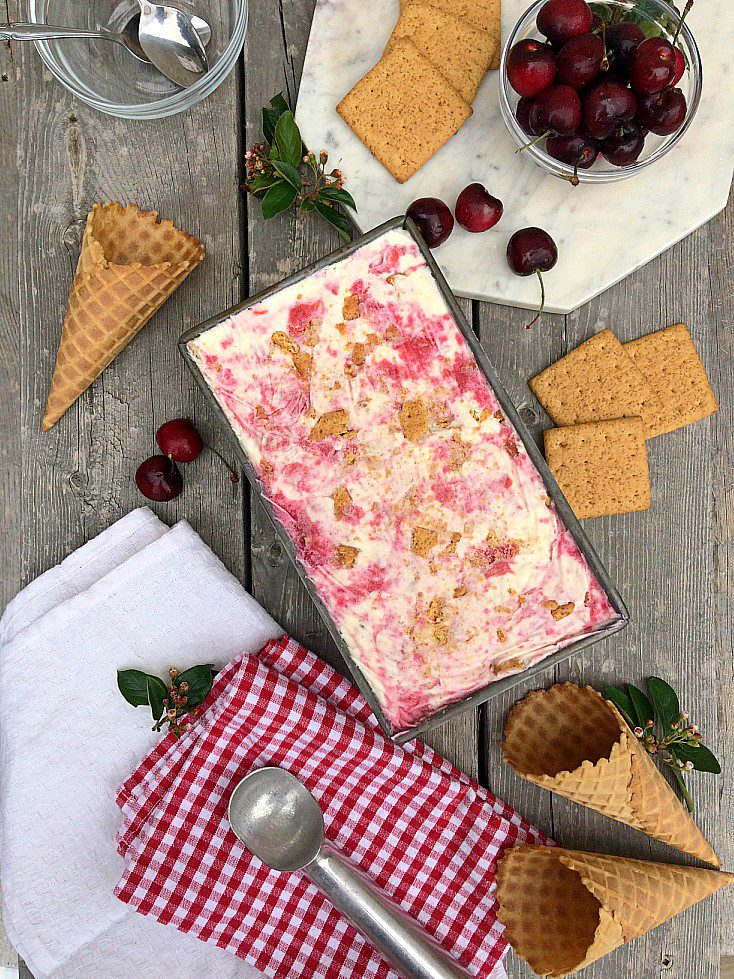
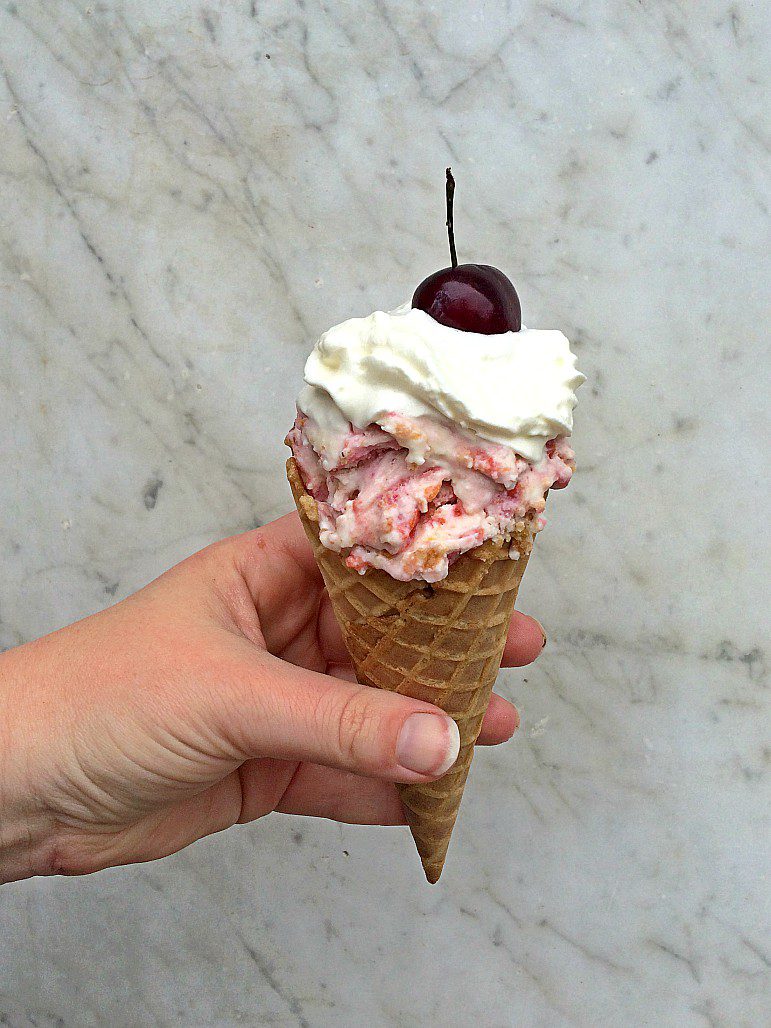
Let the pan of ice cream sit at room temperature for 5-10 minutes before serving.  Scoop  and serve!

This version is packed with cherries and is so much more flavourful than the boughten one.

No-churn Cherry Cheesecake Ice Cream is the perfect summer treat! Whip up this homemade recipe in no time and have your kids begging for more.

P.S.- My friend in the story just so happens to be coming over to my house with her son today.  I can’t wait to share with them.

Let’s hope her son doesn’t get chicken pox.  😉

What’s your favourite ice cream flavour?  I’m planning two more ice cream posts this summer and, I’d love to feature yours!

No-churn Cherry Cheesecake Ice Cream is the perfect summer treat! Whip up this homemade recipe in no time and have your kids begging for more.


No Churn Cherry Cheesecake Ice Cream

Everything you love about cherry cheesecake in ice cream form.

Serves 12
Ingredients:
2 cups whipping cream,
1 cup salted butter, melted,
1 cup white sugar,
1 cup powdered skim milk,
2 tsp vanilla,
1/2 brick cream cheese,
2 tbsp water,
2 cups sour cherries,
sugar to taste, try 1/2 cup,
1 tbsp cornstarch,
5 graham crackers.Instructions:

If making your own cherry pie filling, heat two cups of cherries and 1/2 cup of sugar on medium high. Mix cornstarch with a tiny bit of water to make a smooth liquid. This will prevent clumps.

Add to the cherries when they start to bubble. Stir for a minute or two, or until it reaches desired thickness. (It should be quick. If not, add more cornstarch.) Set aside and let cool.

Whip the 2 cups of whipping cream until soft peaks form, about 2 minutes. Set aside.

In a food processor, combine butter, sugar, skim milk powder and vanilla until very well blended. Do not worry if there is still a bit of graininess, you will not taste it.

Skip this step if using pre-made sweetened condensed milk. Set aside.

Blend the cream cheese with 2 tbsp water until smooth. In a large bowl, combine whipped cream, sweetened condensed milk mixture, and cream cheese to form the ice cream base.

In a large baking pan, pour in half the ice cream base and top with half the cherry pie filling. Crumble two graham crackers and spread.

Repeat the process. Mix lightly with a spatula. Top with one last graham cracker for presentation.

Cover tightly with saran wrap and set in freezer for overnight. Your ice cream may be ready in as little as 6-8 hours, but mine wasn’t.

Set out for 5-10 minutes before you’re ready to serve. Enjoy!


Pin me for later!

No-churn Cherry Cheesecake Ice Cream is the perfect summer treat! Whip up this homemade recipe in no time and have your kids begging for more.

For behind the scenes peeks on my latest posts, follow me on Facebook and Instagram.  Both accounts are different!

SaveSave

Want to Start a Vegetable Garden?

Screen shot 2018 04 19 at 4.23.58 pm

Learn the basics in just a few minutes, and set up your first garden in a day or less!

Get just the basics you need to start your garden this spring. I'll also email you a mini email course, helpful tips and easy garden advice, straight to your inbox.

Ready to start your garden adventure?

Success! Now check your email to confirm your subscription.

There was an error submitting your subscription. Please try again.

We won't send you spam. Unsubscribe at any time. Powered by ConvertKit
Kristen Raney

Kristen is a former farm kid turned urban gardener who owns the popular gardening website, Shifting Roots.  She is obsessed with growing flowers and pushing the limits of what can be grown in her zone 3b garden.  She also loves to grow tomatoes, but oddly enough, dislikes eating them raw.

20 Comments
Filed Under: Uncategorised Tagged: cheesecake, Cherries, dessert, easy, ice cream, Kids, no churn, no-bake, recipe, Sour cherries, summer

About Kristen Raney

Kristen is a former farm kid turned urban gardener who owns the popular gardening website, Shifting Roots.  She is obsessed with growing flowers and pushing the limits of what can be grown in her zone 3b garden.  She also loves to grow tomatoes, but oddly enough, dislikes eating them raw.

Comments

  1. Emily @ Pizza & Pull-ups says

    June 16, 2017 at 8:34 am

    This sounds so good, I have never made ice cream, but I worked at an ice cream shop in high school and it is one of my favorite treats.
    Reply
  2. Rose says

    June 16, 2017 at 8:41 am

    Looks SO good! Cherry cheesecake has such a fantastic flavor.
    Reply
  3. Chelsea Rose says

    June 16, 2017 at 9:04 am

    This looks amazing, and not too difficult. ... although maybe the waiting for it to be ready will be! Thanks for sharing!
    Reply
  4. Alexandra says

    June 16, 2017 at 9:44 am

    Yum! I have pinned/saved a few recipes for no-churn ice cream but haven't tried it yet. This makes it seem super easy and I'll have to give it a go this summer!
    Reply
  5. Sumer | Grace, Giggles & Naptime says

    June 16, 2017 at 11:00 am

    This looks AMAZING! My hubby would LOVE this! Pinned this and totally going to make this summer. Your pics are so adorable, too! :)
    Reply
    • Kristen Raney says

      June 17, 2017 at 9:15 am

      Aww, thanks so much! I'd love to know how yours turned out.
      Reply
  6. Corey | The Nostalgia Diaries says

    June 16, 2017 at 11:16 am

    I've been wanting to try no-churn ice cream with my daughter. This looks SO good - the perfect summer ice cream!
    Reply
  7. Christine C says

    June 16, 2017 at 11:31 am

    This sounds amazing! One of my favorite flavors growing up that I haven't had in forever is blueberry cheesecake ice cream. Now that I have 4 blueberry bushes, I'm thinking I might have to adapt this recipe and try it out! Pinning for later, thanks!
    Reply
    • Kristen Raney says

      June 17, 2017 at 9:14 am

      Do it! I'd love to know how it turns out.
      Reply
  8. Katie says

    June 16, 2017 at 5:50 pm

    This looks delicious. I saved it to Pinterest to make sure I try it out!
    Reply
  9. Summer @ Coffee With Summer says

    June 16, 2017 at 9:02 pm

    OH my heavens, this looks delicious! Need to make for a summer get together this year!
    Reply
  10. Aryn says

    June 17, 2017 at 6:22 am

    Yuuummm! I love making ice cream and we will definitely be giving this a try!
    Reply
  11. Jackie says

    June 17, 2017 at 7:53 am

    This looks so good! Also what a yummy summer dessert. Thanks for sharing this recipe.
    Reply
  12. Abram says

    June 17, 2017 at 2:02 pm

    This looks absolutely amazing. I'm going to have to try this out. Pinned!
    Reply
  13. Kate says

    June 17, 2017 at 4:38 pm

    This sounds incredible! My favorite ice cream is anything with mint. I'll have to try this over the summer though. Thank goodness it was chicken pox and not an allergy!
    Reply
  14. Jessica Devlin Design says

    June 19, 2017 at 3:14 pm

    oh my! that looks flipping unbelievably good. going to give this a try. thank you
    Reply
  15. Easton Salomon says

    June 22, 2017 at 1:47 pm

    This easy, five ingredient Cherry Cheesecake Ice Cream is cool, creamy and packed with flavor. This no - churn treat features a vanilla cheesecake base that’s loaded with juicy cherries . And best of all, it’s made without an ice cream maker!
    Reply
  16. Tina says

    June 3, 2018 at 7:58 am

    Hello, the recipe for cherry cheesecake ice cream sounds delicious, but please can you tell me how much half a brick of cream cheese weighs as we don't buy it in bricks here in France!
    Reply
    • Kristen Raney says

      June 3, 2018 at 9:03 am

      Sorry about that! Half a brick of cream cheese is 4 ounces or approximately 113 grams. Good luck, I'd love to know how it goes.
      Reply

Trackbacks

  1. Featured Canadian Foodie: Shifting Roots | Food Bloggers of Canada says:
    March 15, 2019 at 12:30 pm
    […] post for No Churn Sour Cherry Cheesecake Ice Cream most sums up me and my recipes: It has to be as simple as possible, sweet, and bonus points for […]
    Reply

Leave a Reply to Chelsea Rose Cancel reply

Your email address will not be published. Required fields are marked *

This site uses Akismet to reduce spam. Learn how your comment data is processed.

Grow roots with us

  • Email
  • Facebook
  • Instagram
  • Pinterest
  • Twitter
  • YouTube

Welcome!

Hi, I'm Kristen and I help new gardeners learn to grow their own vegetables and beautify their yards. I also share recipes that use all that delicious garden produce. Grab a coffee (and your gardening gloves) and join me for gardening tips, simple recipes, and the occasional DIY, all from the lovely city of Saskatoon, Saskatchewan.

P.S. First time gardener? You'll want to download the quick start gardening guide below!

Recent Posts

  • How to Make a Tempting Christmas Cookie Tray (Plus Recipes!)
  • Cranberry Butter Tarts
  • 10 Easiest Annual Cut Flowers to Grow From Seed and 2 to Avoid
  • Why Won’t My Christmas Cactus Bloom? (And What to Do About it)
  • The Best Companies to Purchase Cut Flower Seeds for your Backyard Flower Farm

Welcome!

Hi, I’m Kristen and I help new gardeners learn to grow their own vegetables and beautify their yards. I also share recipes that use all that delicious garden produce. Grab a coffee (and your gardening gloves) and join me for gardening tips, simple recipes, and the occasional DIY, all from the lovely city of Saskatoon, Saskatchewan.

Connect with Shifting Roots On. . .

  • Email
  • Facebook
  • Instagram
  • Pinterest
  • Twitter

Find What You’re Looking For. . .

Learn the Basics of Gardening in Just a Few Minutes

Screen shot 2018 04 19 at 4.23.58 pm

Gardening doesn't have to be complicated. Learn the basics in minutes, get started with your first garden in a day or less, and start your lifetime gardening adventure.

Enter your name and email address to download the Quick Start Garden Guide. You'll also get a mini-email course and weekly gardening tips and advice.

Success! Now check your email to confirm your subscription.

There was an error submitting your subscription. Please try again.

We won't send you spam. Unsubscribe at any time. Powered by ConvertKit
Instagram post 2196671569572144940_2204272319 The Christmas baking tray wouldn't be complete without a batch of butter tarts! (Well, at least in Canada 🍁. . . )  I personally love butter tarts with or without nuts or raisins, but I think I love this cranberry version the best of all.⁠
⁠
I'm curious, are you team plain, nuts, raisins, or cranberry butter tart?⁠
⁠
Whatever version you choose, I love making butter tarts because they look fancy, but they're super fast and easy to make--perfect for those who don't do a lot of baking the rest of the year.⁠
⁠
Here's the recipe. . . ⁠
⁠
1/2 cup butter ⁠
1 beaten egg⁠
1 cup brown sugar ⁠
1 tbsp flour⁠
1 tsp vanilla⁠
2 tbsp cream⁠
1 cup dried cranberries ⁠
16 tart pastry shells⁠
⁠
Combine all ingredients (except shells) into a med high pot. Stir until combined and melted and remove from heat when boiled. Fill tart shells. Bake at 350 for 15 minutes. Cool and serve.
Instagram post 2195916441484264107_2204272319 The 12 Days of Christmas Baking: Day 9⁠
⁠
You know what is always one of the first things to go on the baking trays?  Anything with cream cheese.  These mocha mint cheesecake bites will help keep you awake at the party, and be a hit with your guests.⁠
⁠
1 box of oreos (36 cookies),⁠
1/2 cup melted butter,⁠
2 envelopes powdered whip topping,⁠
1/2 cup milk,⁠
1/2 cup cold brew coffee⁠
2 bricks cream cheese⁠
4 crushed candy canes⁠
Instructions⁠
⁠
Pulse Oreo cookies in a food processor until they are fine crumbs. Stir in melted butter and distribute amongst two lined muffin tins.⁠
Whip two envelopes of powdered whip topping with milk and cold brew coffee. Do not substitute regular whipping cream or all coffee with the powdered whip topping--it will not work!! Set aside.⁠
Whip cream cheese with a small amount of the whipped cream mixture until smooth. Add in the rest of the whipped cream mixture. Spoon overtop of oreo mixture.⁠
Crush four candy canes and sprinkle on top. Crushed Coffee Crisp tastes great too!⁠
⁠
P.S. If you don't like coffee, just replace the cold brew coffee with more milk. ⁠
P.P.S. If you don't have cold brew coffee on hand, brew regular coffee at twice the regular strength.
Instagram post 2195191325988479835_2204272319 DAY 8:  12 Days of Christmas Baking⁠
⁠
Let's take a small break from recipes today and discuss what makes a good baking tray.  The key is in the mix, and in the decor.  The goal of the baking tray is to be as appealing to as many people as possible.  Aim for 4-7 different types of baking.  I personally like to have the following types of goodies in mine: ⁠
⁠
✅One decorated cookie, like gingerbread or sugar cookies⁠
✅One chocolate-based item⁠
✅One item that contains jam or fruit⁠
✅One square⁠
✅Shortbread or one shortbread-based goodie⁠
✅One kid-friendly item⁠
and finally, if no one who will be eating the tray has any allergies. . .⁠
✅One thing that contains nuts⁠
⁠
You want to have a variety of different flavours and textures so that you keep your guests coming back for more.  And yes, I may have over-thought this a little bit!⁠
⁠
What's that one thing you hope will be on a baking tray?⁠
⁠
I always go for the shortbread!⁠
⁠
#bakingtray #christmasbaking #dainties #bakingaddition #bakinglover #bakinglovers #thefeedfeedbaking #christmastraditions
Instagram post 2194827779875063954_2204272319 This is me about three-almost-four years ago.  I had just done an interview for a self-love blog by @naomizurv . I was at an interesting place in my life because I was starting this blog, we had finally received Dominic’s Autism diagnosis, and my husband and I had decided that as much as we wanted more kids, it seemed we were destined to be a family of three.  This picture (and interview) was all about accepting life as it was and choosing to make the best of it.  Most of the time I was very happy, but there were times where acceptance only got me so far.  Friends kept having second and third babies, and while I was happy for them, I was sad for me.  Then last February—almost 7 years since Dominic was born—-we had our miracle second baby.  This May, we’ll be having a third surprise miracle baby. 
I’ve been really struggling with breaking the news on social.  While I am over-the-moon to be a Mom for the third time, I also keenly remember the woman in this photo who would have cried and felt bad for a week if I heard this news about someone else.  I also feel like every time I tell people about this pregnancy, they look at me like I’m crazy or are kind of making fun of me.  Just because this was not the timing I would have picked doesn’t mean this baby is any less special, loved, or fiercely wanted.  And while I’m very nervous about handling two babies 15 months apart, I know that it will be worth it to hold my baby I never even dared to dream of.

So there.  I’ve spilled the beans.  Now maybe I can show my face on social media again.  But if not, you know I’m just over here trying to wrap my head around some very big (and good!!) life changes.
Instagram post 2194466595210828187_2204272319 DAY 7: 12 days of Christmas Baking⁠
⁠
So why am I showing you cinnamon buns that aren't cooked?  To prove how much delectable sauce will be at the bottom of this version. . . obviously. 😉⁠
⁠
You can make this cinnamon bun recipe the night before, then set it in the fridge to rise overnight.  Then all you have to do in the morning is heat the oven, cook the cinnamon buns while everyone is unwrapping presents, and they'll be fresh, hot, and ready by the time you're done.⁠
⁠
I also like to save a bit of the sauce and pour it over the cinnamon buns right when they come out of the oven.⁠
⁠
Ingredients:⁠
1 tbsp yeast,⁠
1 tbsp sugar,⁠
1 cup warm water,⁠
2 eggs,⁠
5 cups flour,⁠
pinch of salt,⁠
cinnamon for sprinkling,⁠
brown sugar for sprinkling,⁠
1/2 cup melted butter for rolls,⁠
1 cup cream,⁠
1 cup brown sugar,⁠
1 cup butter.⁠
⁠
Instructions:⁠
⁠
Dissolve sugar in warm water and add yeast. Let sit for ten minutes. Whisk in two eggs. Add flour one cup at a time and mix with dough hook. Add in the pinch of salt with one of your cups of flour. Do not add in the salt before the flour, as it can make the yeast less effective. Let the dough rise in a greased bowl for 60-90 minutes, or until doubled. If it is cold outside, let rise in an oven that has been warmed up and turned off.⁠
⁠
To make sauce, combine the cream, brown sugar, and butter in a sauce pan and mix until combined. Do not boil.⁠
⁠
When the dough has doubled, punch down and divide into 4 smaller balls. Roll out into a rectangle. Spread over some of the melted butter. Sprinkle brown sugar and cinnamon. Roll up and cut into pieces with a string (as shown in the photo above). Set in a greased pie plate or casserole dish and pour in some sauce. Reserve a bit of sauce for drizzling at the end. Bake in a 350 degree oven for 15-20 minutes or until light golden brown. Drizzle with reserved sauce and enjoy!⁠
⁠
#christmasbaking #holidaybaking #cinnamonbuns #theeverygirlbakes #homesteadingskills #urbanhomesteadskills #bakingaddiction #bakinglover
Instagram post 2193741846005217737_2204272319 DAY 6: 12 Days of Christmas Baking⁠
⁠
Today's recipe requires a little more time, but it's the weekend, so you can do it!  This recipe is what my family lovingly refers to as Hutzelbrot.  It's some sort of combination of 3 different German Christmas breads--if you want the full story you'll have to hop on the blog and read about the research I did.  Like many of my family recipes, it's roots are German, but it definitely got North-Americanized along the way.  Anyway.⁠
⁠
It's better than fruitcake and delicious as a breakfast bread.  I didn't really like it as a kid, but now that I'm an adult I gobble it up like there's no tomorrow.⁠
⁠
Ingredients⁠
⁠
2 1/2 cups dried fruit such as peaches, pears, apples, figs, apricots, prunes, cranberries, or currants.⁠
1/2 cup of raisins⁠
5 1/4 cups unbleached white flour⁠
1/2 cup warm water⁠
1 1/2 tbsp dry yeast⁠
1/2 tsp sugar or honey⁠
1 cup liquid from cooking fruit⁠
1 tsp cinnamon⁠
1 tsp salt⁠
1 tsp grated lemon or orange peel⁠
1/2 tsp ground cloves⁠
1/4 cup honey⁠
1/2 cup melted butter⁠
Instructions⁠
⁠
Boil all fruit except raisins. Drain and set one cup of liquid aside for use in the bread recipe.⁠
Combine sugar, yeast and 1/2 cup warm water and let yeast rise for 10 minutes.⁠
Put all ingredients in a mixer and mix with a dough hook until the dough makes a nice soft ball. You can mix by hand, but it is very difficult dough to work with and don't recommend it for beginners.⁠
Place dough in a greased bowl, cover with a tea towel, and let rise in a warm place until doubled in size. This can range from 1-2 hours depending on the humidity level where you live.⁠
Punch down and shape into loaves. Place in greased bread pans and poke holes in the top with a fork. Let rise for 30 minutes to 1 hour.⁠
Bake at 350 for 40-50 minutes, or 25-30 minutes if you use smaller loaf pans.⁠
Notes⁠
⁠
Rising times vary greatly depending on how much humidity is in the air on baking day. Even though the recipe takes a long time, most of that is spent impatiently waiting for the dough to rise.
Instagram post 2193017018314283996_2204272319 DAY 5: 12 days of Christmas Baking ⁠
⁠
Shortbread is one of my favourite Christmas treats, but whenever I made it I would always mess it up.  The first time I tried to replace the butter with margarine. . . bad idea.  Another time, I chose a three ingredient recipe that was so crumbly it wasn't worth eating.  Then I found this recipe and everything was better!! Until 2 Christmas's ago when I went to Jamaica and decided to make them for my new relatives.  Hot and humid country + different butter= cookies that were a complete disaster.  However, we didn't throw them away and someone served them when everyone came to visit the condo we rented.  I was mortified, but my brother-in-law's family loved them, as they had never experienced North American style baking.⁠
⁠
Moral of the story?  Don't make these in a tropical-weather country.  But even if they flop, they're still really delicious!⁠
⁠
1 cup corn starch,⁠
1 cup icing sugar,⁠
2 cups flour,⁠
1 1/2 cups butter, softened⁠
Instructions⁠
⁠
Mix all ingredients and spoon on to a cookie sheet.⁠
Optional: chill for 30 minutes and roll out for a cut cookie⁠
Apply sprinkles or cherries before baking⁠
Bake at 300 degrees Fahrenheit for 15 to 20 minutes. Cookies should have the barest hint of light brown at the edges. Makes 48 small cookies⁠
⁠
If you want the cookies to look like this, skip the sprinkles and the cherries and bake them plain instead.  Once everything has cooled, dip cookies in melted white chocolate and sprinkles.
Load More… Follow on Instagram

Theme Design By Studio Mommy · Copyright © 2019